Dual tip alcohol markers are popular because one barrel can cover broad color work and detail drawing. For a buyer, two nibs do not automatically mean a better marker. The set must balance tip shape, ink flow, reservoir size, color steadiness, packing, and user handling. A brush and chisel pair may fit illustrators. A fine and bullet pair may be easier for schools, craft kits, and private-label starter sets.
This guide explains how to pick dual tip alcohol markers for a line. It shows how to compare nib systems and which sample tests should be done before an OEM order. It focuses on product design and buying calls, not on repeating basic blending tricks.
Dual Tip Alcohol Markers: Quick Answer
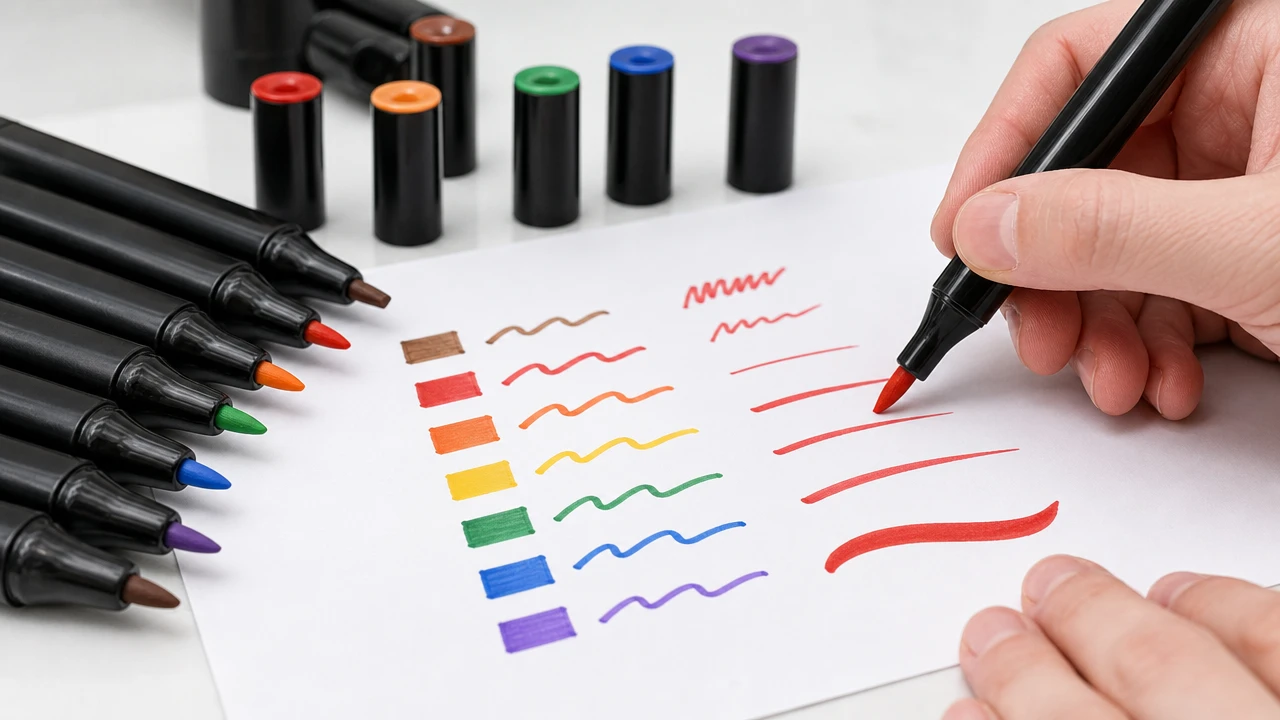
The best set depends on the channel and the work users need to do. Brush tips give flexible, expressive strokes. Chisel tips cover bigger areas and make angled lines. Fine or bullet tips handle outlines and small details. A dual tip system is worth setting when both use cases matter and the barrel can keep both tips fed with steady ink. Before sign-off, test each tip for startup, line width, flow recovery, bleed-through, cap fit, and color steadiness.
Quick Links
- Choose the Channel Before the Tip
- Compare the Main Dual Tip Combinations
- Check Ink Flow and Reservoir Balance
- Select a Set Size That Matches the Use Case
- Sample Tests for an OEM Order
- Packaging and Instruction Decisions
- FAQs

Choose the Channel Before the Tip
Tip choice should follow the sales channel. A professional illustration set may need a flexible brush tip for width change and a chisel tip for fills. A school or starter set may do better with a controlled fine tip and a broad bullet tip. Those are easier to explain and less likely to split in normal use. A craft retailer may prefer a strong medium tip for coloring pages, labels, cards, and small DIY jobs.
| Channel or user | Useful tip pairing | Main sourcing question |
|---|---|---|
| Illustration and manga | Brush plus chisel | Does the brush recover its point after repeated pressure? |
| Beginner coloring | Fine plus bullet | Can users control the line without flooding the page? |
| School and classroom | Bullet plus chisel | Are caps secure and are the tips durable under shared use? |
| Craft and journaling | Fine plus brush | Can the set create both outlines and decorative strokes? |
| Private-label gift set | Brush plus chisel or bullet | Does the visual result justify the packaging and retail price? |
Compare the Main Dual Tip Combinations
Brush and Chisel
Brush-and-chisel sets are versatile and visually attractive. The brush side can create thin-to-thick strokes, while the chisel side is useful for broad fills, angled edges, and quick blocks of color. The trade-off is that the brush tip usually requires better fiber control and more careful cap design. If the brush becomes splayed, the marker may still write, but the product no longer delivers the promised drawing experience.
Fine and Chisel
Fine-and-chisel markers are practical for worksheets, lettering, diagrams, and general coloring. They are easier to specify than brush tips because line width is more predictable. The buyer should still check whether the fine nib is too hard for the target paper and whether the chisel edge stays sharp after repeated use.
Fine and Bullet
Fine-and-bullet combinations are accessible for entry-level sets. The bullet nib is comfortable for controlled fills and rounded strokes, while the fine nib handles outlines. This architecture can be a good choice for a 12- or 24-color starter set, especially when the packaging must explain use with very little text.
Check Ink Flow and Reservoir Balance
A dual tip marker has two delivery paths but normally one inner ink reservoir. That makes balance key. One tip may be used much more than the other. A cap that does not seal well can dry one end before the other. During sample sign-off, store markers flat and upright. Then test both tips after the same wait. Write down startup time, saturation, line smoothness, and whether the less-used end catches up after several strokes.
Ask the factory how the nibs are fitted, whether the fiber grades match, and how the reservoir is checked during assembly. A strong sample should not need hard shaking or repeat pressing to restore normal flow. If the marker uses a special valve or prime step, the pack instruction must match the real user flow.
Select a Set Size That Matches the Use Case
Set size touches both user choice and factory work. A 12-color set is easier to place as an entry product. It leaves room for paper, a case, or a gift box. A 24-color set gives better range for general art and craft. Bigger sets can back pro palettes. They also raise color-card needs, packing size, barcode work, and the risk that some colors are rarely used.
- 12 colors: basic education, starter craft kits, promotional testing.
- 24 colors: general retail, beginner art, school and gift channels.
- 36 colors: broader illustration and creator-focused programs.
- 48 colors or more: professional positioning, specialty palettes, or higher-value bundles.
Do not pick colors from a screen only. Ask for physical swatches on the paper users will get. Alcohol ink can look different on bright white, warm paper, coated stock, and porous sketch paper. The color order, cap code, and printed swatch card should all be checked against the real marker output.

Sample Tests for an OEM Order
A supplier sample should be tested as a product system, not as a pen that writes once. Use these checks before approving bulk production:
- Startup: test both ends after storage and record how quickly each reaches normal saturation.
- Line control: draw slow lines, fast lines, fills, corners, and small details on the target paper.
- Bleed-through: place a clean sheet below the artwork and compare the result with the intended paper specification.
- Cap seal: inspect cap fit, click strength, and whether both caps remain secure during transport simulation.
- Nib recovery: repeat brush strokes or chisel fills and check for splitting, flattening, or fiber shedding.
- Color consistency: compare samples from more than one production batch or filling run when available.
- Packaging: confirm the tray, case, color order, barcode area, and instruction card fit the approved marker dimensions.
For buyer files, photo the same test board for each sample revision. Note the ink formula base, nib part, paper, storage position, and test date. That record helps split a nib problem from a paper or storage problem when the project moves to mass production.
Packaging and Instruction Decisions
Dual tip packing must show the benefit without building false hopes. A clear window can show both nib shapes. A physical swatch card can show broad and fine marks more truly than a busy claim panel. If the set needs a color chart, pass the printed colors against real swatches. Do not build them from a screen-only design.
For private-label projects, say whether the buyer needs a paper sleeve, hanging box, zipper case, rigid gift box, or bulk carton. Packing changes the markers per SKU, shipping guard, carton size, and room for safety and use steps. Tie the final pack to the exact passed tip and color build.
FAQs
Are dual tip alcohol markers better than single tip markers?
They are more versatile when users genuinely need two different stroke types. They are not automatically better if the second tip adds cost, causes uneven flow, or is not useful for the target channel.
Which dual tip combination is easiest for beginners?
Fine plus bullet or fine plus chisel is usually easier to explain than a flexible brush tip. The best choice still depends on the paper, artwork, age group, and packaging instructions.
What should buyers request from a dual tip marker manufacturer?
Request physical samples, nib specifications, ink and reservoir information, cap-fit checks, color swatches, packaging drawings, sample test records, and the planned quality standard before approving production.
For an OEM project, the safest path is to pass tip build, ink behavior, physical swatches, packing, and steps as one connected sample. ZH Stationery can help buyers compare marker formats, set sizes, private-label packing, and production needs before an order is set.
For related material, compare this guide with acrylic paint marker surface performance. Review the marker pen factory audit checklist before final sample sign-off. For general marker safety language, check the ACMI art-material safety guidance.
How to Match the Marker Platform to the Buyer
A dual tip marker should be set from the user flow backward. Illustrators may value a flexible brush tip for width change. Classroom and craft users often need a steady bullet or fine tip that is easy to control. The second tip should solve a real problem. It should not exist just to make the pack look full. When the two tips are rarely used together, the longer barrel, cap parts, and assembly steps can add cost without better repeat orders.
For a private-label set, compare the nib pair with the paper and color count at the same time. A broad chisel tip can use more ink on absorbent sheets. A fine tip may feel scratchy on rough stock. Test light, mid, and dark colors. Flow problems often show first in heavy colors. Record startup time, line recovery, cap fit, and the mark look after the marker has rested.
Production and Quality-Control Questions
Before mass production, ask how the reservoir feeds each end. Ask whether the caps use matching seals and how nib insert depth is controlled, then check several samples from the same batch. Do not pass one pretty prototype. A useful board includes close-up tip photos, full strokes, color swatches, cap-fit samples, storage-position checks, and the final packing dummy. That gives both sides a real base when a later lot is compared.
Set size should also follow the retail story. A small starter set can focus on core color families. A bigger pro line needs a clear color system and a tray that guards both ends. If the set sells online, show the real nib shapes and finished strokes in the product photos.
How to Write a Reliable OEM Specification
A useful RFQ should describe the marker as a full system. State the target user, art type, paper, color count, nib pair, barrel size, cap style, packing format, and expected channel. If a buyer only asks for good dual tip markers, suppliers may quote different platforms that cannot be compared fairly. Split must-have features from optional upgrades. Then the factory can show how each change touches tooling, assembly, and cost.
Ask for a sample matrix, not one prototype. The matrix can hold two nib pairs, two ink-flow options, several color families, and the planned pack. Review startup, saturation, line control, bleed-through, nib recovery, cap fit, and look after storage. Mark each result as passed, revise, or reject. Keep the final version as the production base. That beats picking the sample that feels best in a short demo.
Risks That Affect Repeat Orders
Dual tip products can create complaints when the two ends age differently. A loose cap seal, uneven reservoir link, or mismatched nib fiber may hide at first use. It can show after shipping or storage. Put flat and upright conditioning in the sign-off plan. Check both ends after the same wait. Also confirm that the final carton stops caps from pressing on the nibs.
For online retail, product photos should show the real tip shapes, normal strokes, and physical color swatches. For wholesale, the pack should make counting, color sorting, and carton handling easy. A clear dual tip program gives buyers a stronger product story. It gives the factory a repeatable target. It cuts the chance that a low-cost change weakens the user experience. Do not promise pro performance until the marker passes the buyer's paper, storage, and repeat-use tests.