
Los marcadores de pintura acrílica sobre madera pueden producir letreros, adornos, etiquetas de regalo, cajas, juguetes y decoración para el hogar con un acabado limpio, pero la madera es menos tolerante que el papel. La veta, el polvo, la humedad, las marcas de lijado y el acabado antiguo pueden alterar la forma en que la pintura se asienta sobre la superficie. Un marcador que se ve nítido en cartón recubierto puede deshilacharse en pino crudo o saltar sobre contrachapado rugoso.
Para la mayoría de los proyectos de manualidades y venta minorista, los marcadores de pintura acrílica a base de agua son el mejor punto de partida. Son más fáciles de manejar para uso de aficionados que los marcadores con alto contenido de solventes, ofrecen color opaco y funcionan bien con instrucciones simples: lijar, limpiar, probar, pintar en capas finas, secar y luego sellar si el artículo se va a manipular. Los compradores que comparan sistemas de tinta también pueden consultar nuestra guía de marcadores de pintura acrílica frente a marcadores de alcohol.
ZH Stationery apoya a compradores en el abastecimiento marcadores de pintura acrílica, kits de manualidades de marca privada y programas de marcadores listos para empaquetar. Si su línea de productos incluye adornos de madera, kits de señalización, tableros de manualidades para niños, etiquetas de regalo o decoración de bricolaje, use esta guía para definir la superficie de madera, la punta del marcador, el juego de colores, las instrucciones de sellado y los controles de calidad antes de aprobar muestras. Para líneas adyacentes de artesanía en piedra, nuestra guía de marcadores de pintura para rocas explica cómo cambian la elección de la punta, el secado y la compatibilidad con el sellador en una superficie mineral.
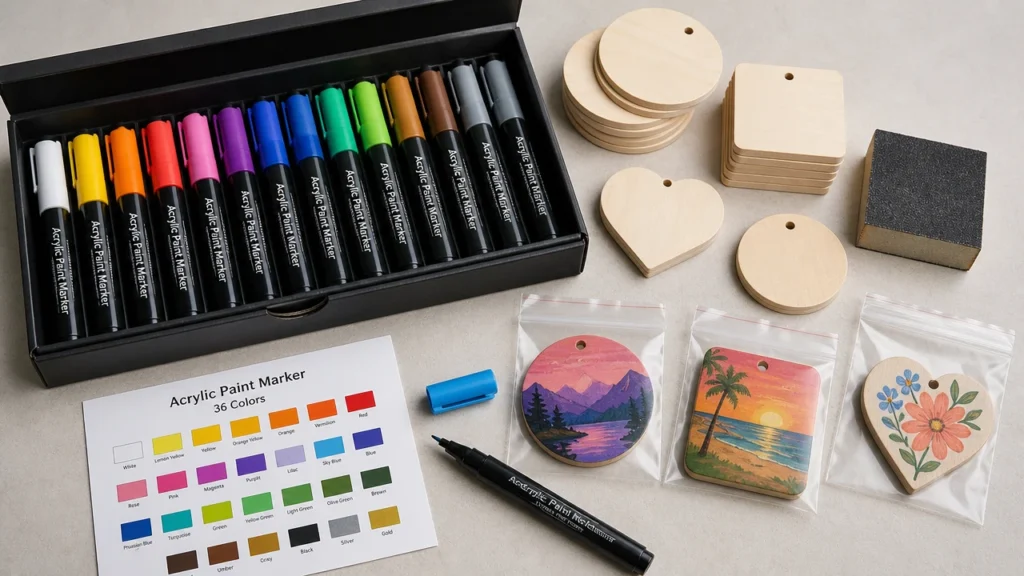
Marcadores de pintura acrílica sobre madera: respuesta rápida
Los marcadores de pintura acrílica funcionan mejor sobre madera limpia, seca y ligeramente lijada. Para madera sin acabar, lije la superficie, elimine el polvo, pruebe el marcador y use capas finas para que el color no se deshilache en la veta. Para madera pintada o sellada, pruebe primero la adherencia porque los recubrimientos brillantes pueden hacer que la pintura forme gotas, se raye o se desprenda. Selle el diseño terminado con una capa transparente compatible cuando el artículo se vaya a manipular, exhibir al aire libre o empaquetar como proyecto de manualidades para venta minorista.
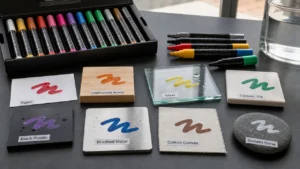
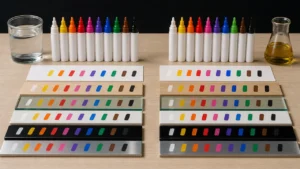
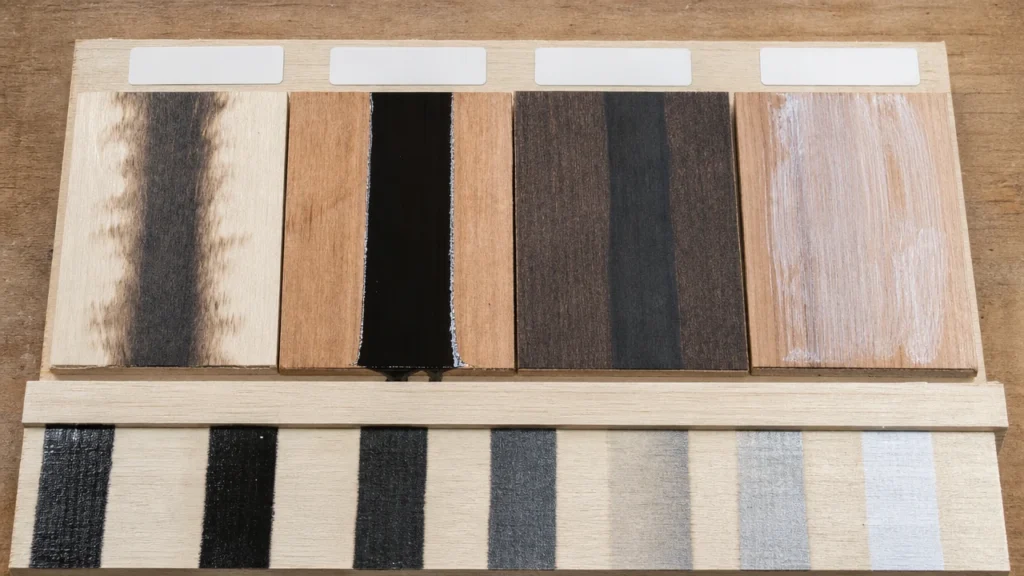
Para el abastecimiento B2B, no apruebe el marcador basándose únicamente en una muestra de papel. Solicite muestras de madera: madera cruda, madera lijada, madera imprimada, madera pintada y madera sellada. Luego verifique la opacidad, el borde de la línea, el tiempo de secado, la compatibilidad con el sellador, la resistencia al rayado y si la tarjeta de instrucciones coincide con el proceso real.
Enlaces rápidos
- Elija el marcador adecuado
- Comparación de superficies de madera
- Prepare la madera antes de pintar
- Pinte en capas finas y controladas
- Cómo sellar marcadores de pintura acrílica sobre madera
- Errores comunes
- Empaque de kits B2B y control de afirmaciones
- Pruebas de control de calidad
- Haga mejores preguntas al proveedor
- Preguntas frecuentes
Elija el marcador adecuado
El mejor marcador para manualidades en madera suele ser un marcador de pintura acrílica a base de agua con pigmento fuerte, flujo constante y una punta que pueda manejar textura ligera. Una punta bala mediana es la opción más segura para letreros y adornos de madera en general. Las puntas finas son útiles para lettering y detalles, pero funcionan mejor en madera más lisa. Las puntas de pincel pueden ser atractivas para papel o lienzo, pero la veta rugosa puede dañarlas rápidamente.
El control del flujo es importante porque la madera puede extraer la tinta de la punta de manera desigual. Un sistema de válvula puede ayudar al usuario a cebar el marcador y reiniciar el flujo cuando sea necesario. La tecnología de marcado por presión de válvula guía explica por qué los marcadores de agitar y presionar necesitan instrucciones claras para el usuario, especialmente en superficies de manualidades.
Los marcadores de pintura a base de aceite pueden funcionar en algunos proyectos de madera, pero pueden presentar olor, secado más lento y mayores advertencias necesarias. Los marcadores permanentes comunes son fáciles de usar, pero el color puede hundirse en la madera cruda y verse débil. Los marcadores de alcohol son mejores para ilustración en papel que para decoración opaca en madera.
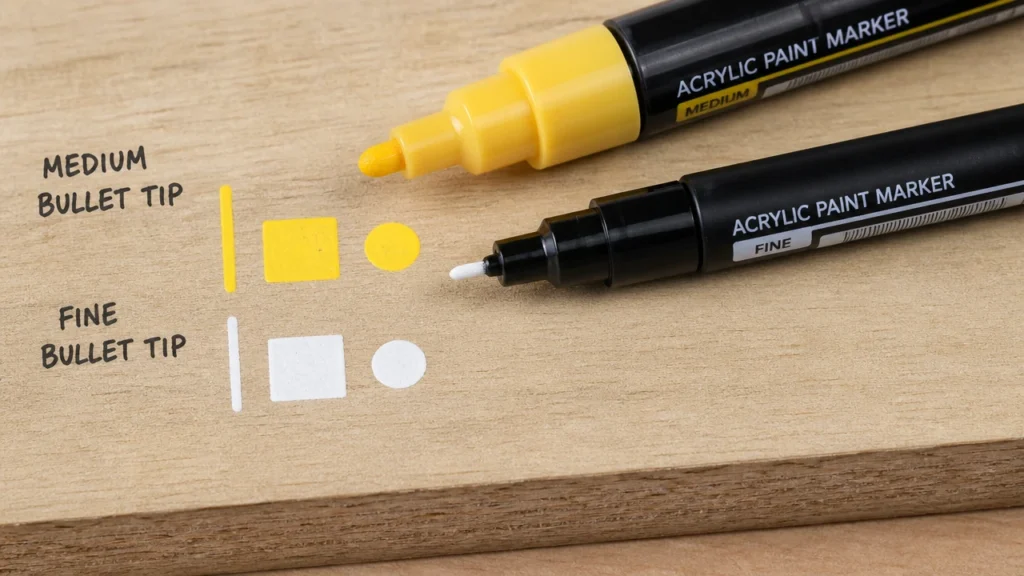
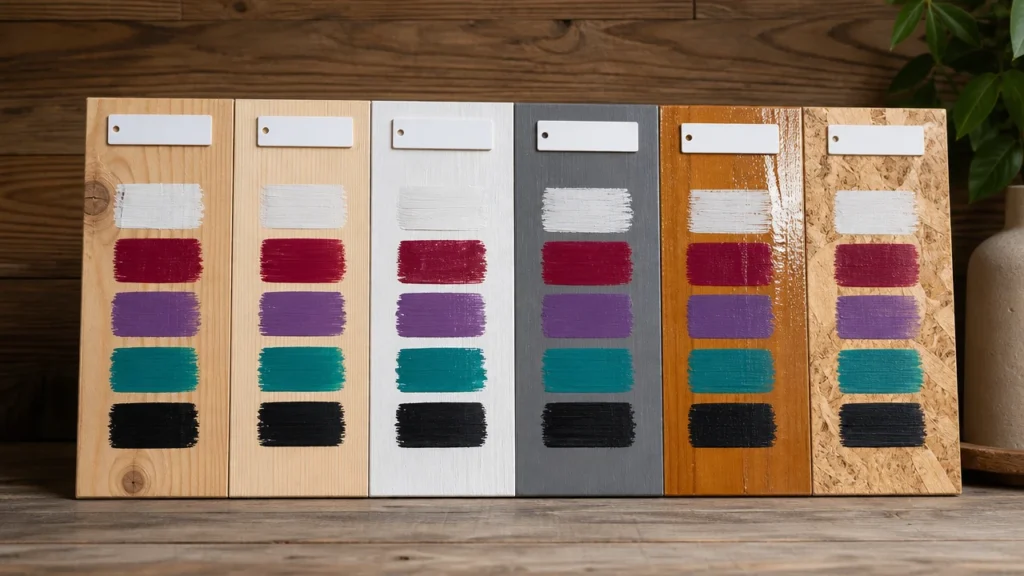
Comparación de superficies de madera
| Superficie de madera | Comportamiento del marcador | Recomendación del comprador |
|---|---|---|
| Madera cruda sin acabar | La pintura puede absorberse en la veta y deshilacharse en los bordes | Lije y pruebe. Considere una capa base para un color más brillante. |
| Madera sin acabar lijada | Líneas más limpias y cobertura más predecible | Mejor punto de partida para la mayoría de los kits de manualidades en madera. |
| Madera imprimada | Color más brillante y menos absorción | Buena para fotos de producto y kits para principiantes si las instrucciones mencionan la imprimación. |
| Madera pintada | Funciona si la superficie es mate y limpia | Pruebe la adherencia antes de aprobar afirmaciones de empaque. |
| Madera sellada brillante | La pintura puede formar gotas, rayarse o desprenderse | Puede ser necesario un lijado ligero o una preparación de superficie adecuada. |
| Piezas en blanco de contrachapado o MDF para manualidades | Pueden funcionar bien, pero los bordes y el polvo afectan los resultados | Pruebe tanto la cara como los bordes antes de la producción en masa. |
La lección principal es simple: la madera no es una sola superficie. Un marcador que funciona en un adorno liso de tilo puede no comportarse igual en pino rugoso, contrachapado pintado o tableros decorativos brillantes. La aprobación de muestras debe usar las mismas piezas en blanco de madera que recibirán los clientes.
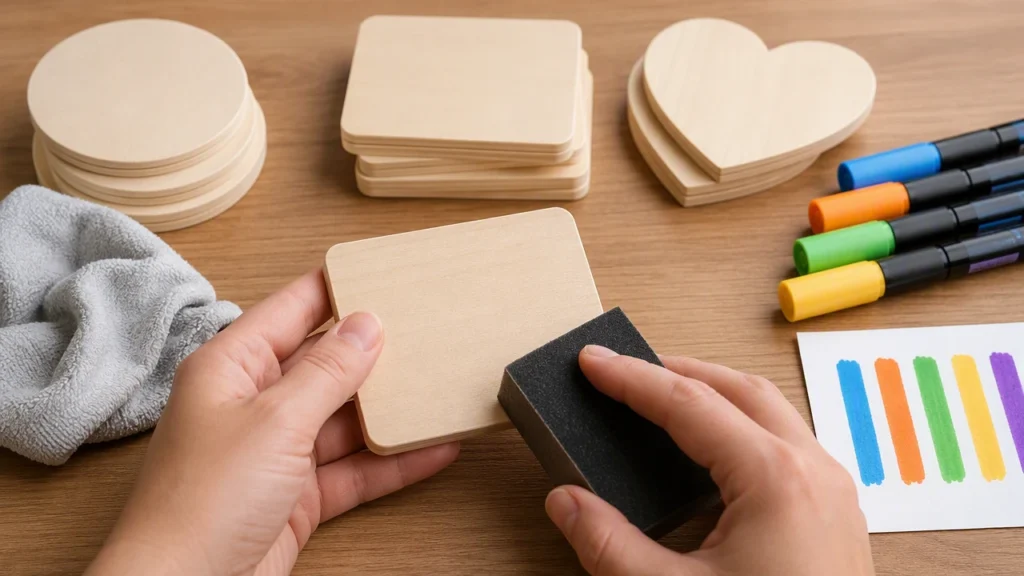
Prepare la madera antes de pintar
Comience con madera limpia y seca. Lije ligeramente la superficie y luego elimine el polvo con un paño seco o un paño de tack. El polvo que queda en la madera puede mezclarse con la pintura y hacer que las líneas se vean sucias. Si la madera es aceitosa, encerada o brillante, el marcador puede no adherirse bien sin preparación adicional.
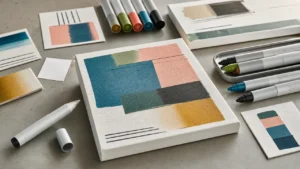
Para un color más brillante, use una capa base acrílica blanca o transparente y déjela secar antes de marcar. Esto es especialmente útil para colores pálidos, metálicos, pasteles y lettering pequeño. Si el kit minorista no incluye imprimación, no muestre solo muestras imprimadas en las fotos de producto a menos que el empaque explique ese paso de preparación.
Una buena tarjeta de instrucciones debe indicar a los usuarios que prueben el marcador en la parte posterior de la madera o en una pieza de repuesto primero. Ese pequeño paso evita muchas quejas sobre deshilachado, opacidad débil y secado desigual.
Pinte en capas finas y controladas
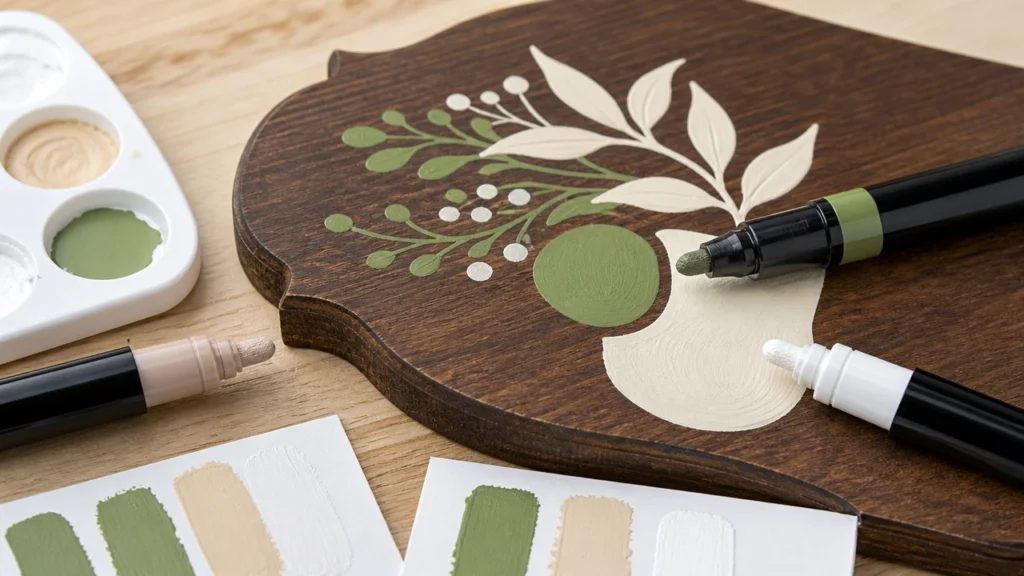
Agite el marcador, cébelo en material de desecho y comience con presión ligera. La presión fuerte puede inundar la punta y empujar demasiada pintura hacia la veta de la madera. Las capas finas se secan más limpias y son más fáciles de sellar después. Para madera oscura, deje secar la primera capa antes de aplicar una segunda pasada.
Para lettering, use madera más lisa y mantenga el ángulo del marcador estable. Para puntos y patrones decorativos pequeños, pruebe si la punta deja una marca redonda limpia o un borde difuso. Para formas rellenas, delinee primero y luego rellene el centro con trazos superpuestos.
La planificación de colores también es importante para los sets minoristas. Blanco, negro, rojo, amarillo, azul, verde, dorado y plateado estándar son fáciles de vender para letreros de madera. Los metálicos y Marcadores de pintura acrílica con super brillo pueden respaldar adornos para regalo y kits de manualidades de temporada, pero los compradores deben aprobar muestras de madera separadas para los colores de efecto.
Cómo sellar marcadores de pintura acrílica sobre madera
Deje que el diseño con marcador se seque completamente antes de sellar. Luego pruebe un barniz acrílico transparente compatible, poliuretano a base de agua o capa transparente para manualidades en una pieza de muestra. Aplique capas finas en lugar de una capa gruesa. Un sellador pesado puede ablandar la pintura fresca, arrastrar el color, crear áreas nubladas o acumularse en la veta de la madera.
Los selladores con brocha ofrecen más control para piezas pequeñas de manualidades y kits de interior. Los selladores en spray pueden cubrir de manera uniforme, pero los usuarios deben seguir la etiqueta del sellador y usar ventilación adecuada. Para kits de manualidades orientados a niños, tenga cuidado con la redacción. Un set de marcadores puede explicar que los usuarios adultos pueden sellar la pieza terminada por separado, pero no debe instruir casualmente a los niños a rociar recubrimientos.
El set de marcadores de pintura acrílica La CPSC Guía de Seguridad para Arte y Manualidades señala que los fijadores en spray pueden contener solventes peligrosos al inhalarse y recomienda opciones más seguras cuando sea posible. Use lenguaje cauteloso en el empaque y deje que la etiqueta del sellador controle las instrucciones de seguridad.
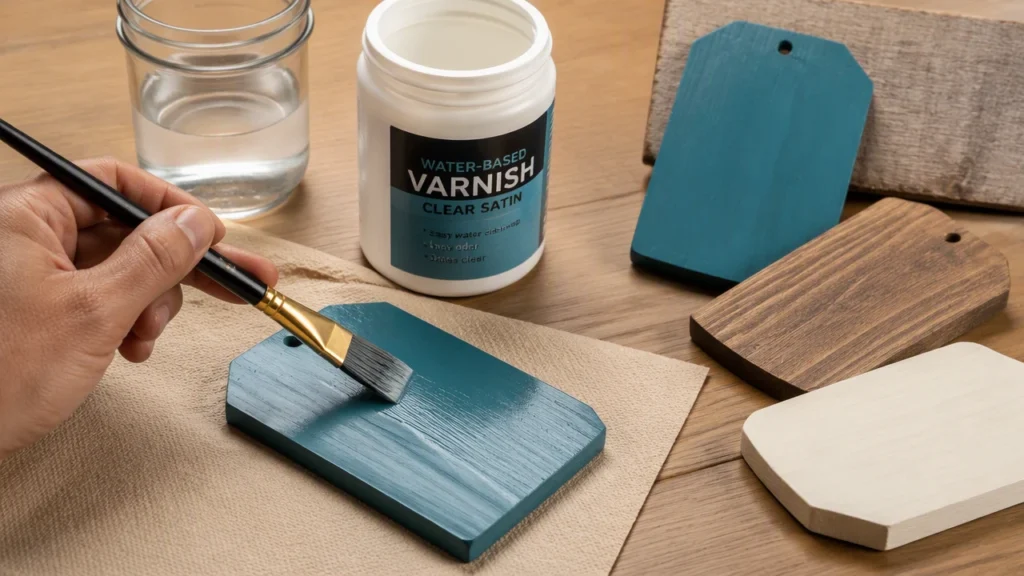
Opciones de sellador que los compradores deben probar
- Barniz acrílico transparente para adornos y letreros de madera de interior.
- Poliuretano a base de agua para tableros de manualidades manipulados cuando sea compatible con el marcador.
- Acabado mate cuando el comprador quiere un aspecto natural hecho a mano.
- Acabado brillante cuando el comprador quiere un color más vivo en la fotografía de producto.
- Capa transparente para exteriores solo cuando el sistema final de marcador más sellador haya sido probado para esa afirmación.
Errores comunes
La mayoría de las fallas provienen de la preparación de la superficie, no solo del marcador. La madera cruda puede absorber la pintura. El polvo puede romper la línea. El recubrimiento brillante puede rechazar la pintura. La pintura húmeda puede mancharse bajo el sellador. Una superficie rugosa puede dañar las puntas finas. Las reseñas de producto a menudo describen estos como defectos del marcador, pero la causa raíz puede ser la superficie y las instrucciones.
| 错误 | 发生情况 | 更佳说明 |
|---|---|---|
| 在灰尘多的木头上作画 | 颜色显得脏污或不均匀 | 作画前轻轻打磨并清除灰尘。. |
| 用力过大 | 笔尖溢墨或线条边缘晕开 | 先在废料上打底,并以轻力度作画。. |
| 过早密封 | 颜料涂抹、脱落或产生云雾状痕迹 | 让图案完全干燥后再测试密封剂。. |
| 未测试便使用有光泽的涂层木材 | 颜料成珠状或刮落 | 先测试附着力或轻轻处理表面。. |
| 仅批准纸质色卡 | 木材性能未知 | 订单批准前要求提供真实木材样品。. |
| 宣称过于宽泛的户外用途 | 客户期望超出测试证据 | 使用与密封和固化说明相关的有限宣称。. |
Empaque de kits B2B y control de afirmaciones
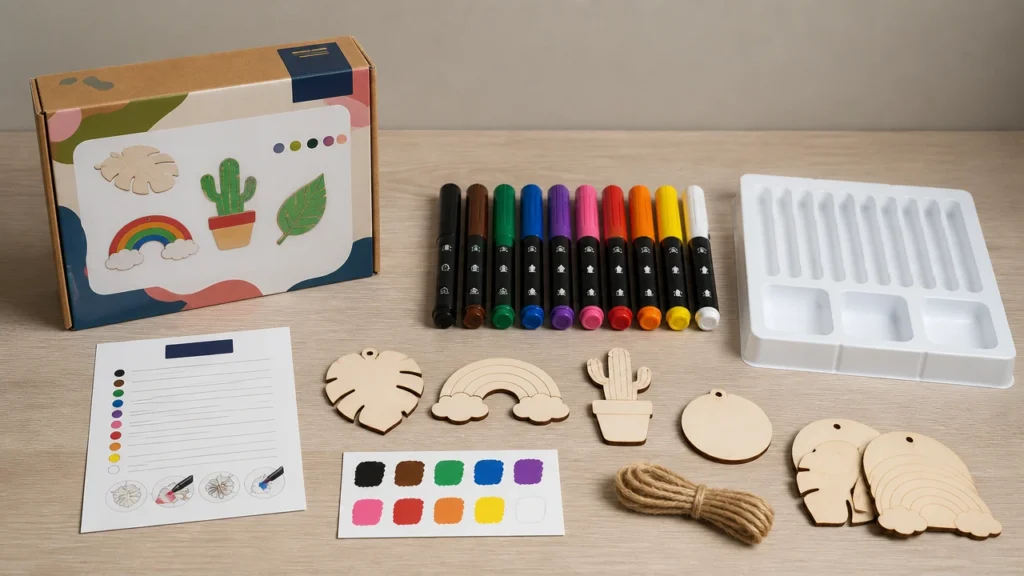
木工马克笔套装应清晰展示使用流程。展示真实木材样品,而不仅是数字图稿。附上包含打磨、除尘、打底、干燥、分层、密封和存放指南的说明卡。若套装包含木质坯件,请在批量生产前使用马克笔测试确切坯件。.
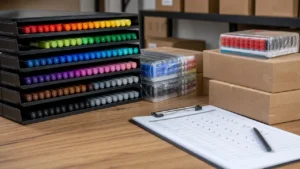
包装空间很重要。该 opciones de empaque para rotuladores acrílicos 指南可帮助买家规划说明卡、色卡、警示面板、托盘、替换笔尖和纸箱标签。若套装面向亚马逊或零售货架,买家还应决定盒面标注“木工艺品”、“木制装饰品”、“木牌”或“多表面丙烯酸马克笔”。.
为安全和合规起见,请勿将性能宣称与安全标签混为一谈。该 CPSC sobre materiales de arte 说明艺术材料需要毒理学评估,而 Práctica de etiquetado ASTM D4236 涵盖慢性危害标签规范。ACMI还通过其 Resumen de regulaciones ACMI y Página de seguridad de materiales de ACMI .
木工马克笔质量控制测试
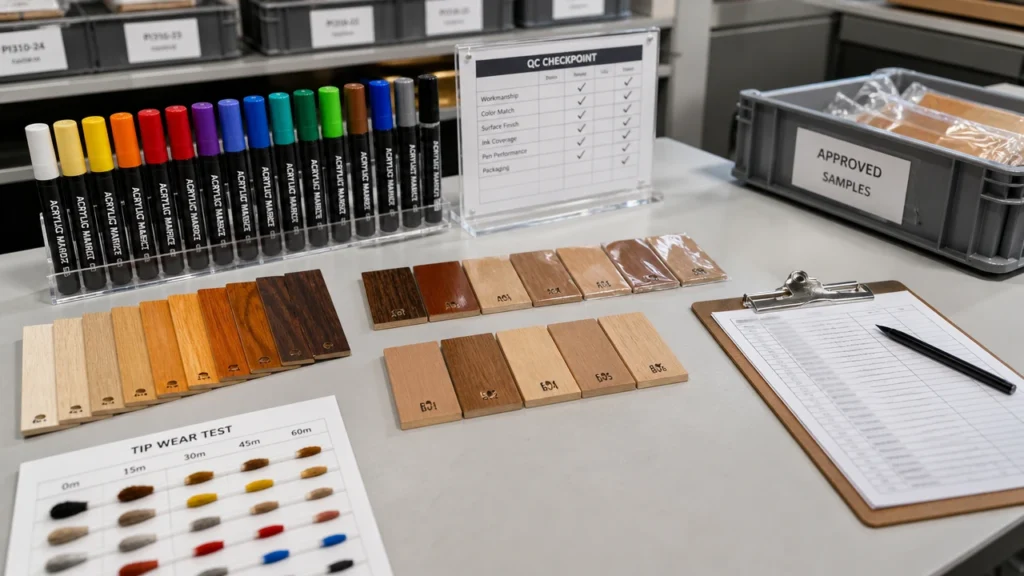
木材马克笔样品测试应模拟客户真实使用场景。测试原木、打磨、打底、上漆和密封木材。取样浅色、深色、金属色及任何闪光效果。检查纹理边缘、不透明度、干燥时间、分层、密封剂兼容性、笔帽存放及纹理木材上的笔尖磨损。.
| Punto de control de calidad | Qué verificar | Formato del juego minorista |
|---|---|---|
| Opacidad | 白色、黄色、粉彩、金属色和黑色,分别用于原木和打底木材 | 浅色在产品照片和用户作品中可能显得效果不佳。. |
| Borde de línea | 原木上的晕染及打磨木材上的顺滑度 | 木纹可能使文字显得模糊。. |
| Flujo | 首次打底、存放后重启、点控和线条一致性 | 出墨不均会导致墨点、断墨和投诉。. |
| Desgaste de la punta | 细头和中等笔尖用于光滑木材和粗糙坯件 | 粗糙木材对笔尖的磨损比纸张或帆布更快。. |
| Secado | Tiempo de secado al tacto antes de la segunda capa y antes del sellado | 过早密封会弄脏或破坏图案。. |
| Compatibilidad del sellador | 在样品件上测试刷涂和喷涂清漆 | 某些密封剂会拖拽颜料或使表面发雾。. |
批准自有品牌订单前,请索取留样和生产色卡。ZH Stationery的 página de certificaciones, recorrido por la fábrica, y quiénes somos las páginas proporcionan pruebas y contexto de fábrica para la revisión del comprador.
Haga mejores preguntas al proveedor
有用的供应商答复应描述木材测试、马克笔系统和包装宣称。仅凭目录中的“是”不够。.
- 1. 你们测试了哪些木材表面?
有用的答复应区分原木、打磨木材、打底木材、上漆木材、光泽密封木材、中密度纤维板、胶合板以及套装中使用的确切坯件。. - 2. 哪种马克笔笔尖最适合木牌或装饰品?
有用的答复应解释中头、细头或极细头的取舍,并提及纹理木材上的笔尖磨损。. - 3. 马克笔需要打底或底漆吗?
有用的答复应说明何时需要打底,尤其是浅色、金属色、深色木材或高吸水性表面。. - 4. 用户应等待多久再密封?
有用的答复应给出实用的干燥和样品测试建议,而不承诺适用于所有木材和气候的统一时间。. - 5. 你们用哪种密封剂测试了马克笔?
有用的答复应包含密封样品,并说明密封剂是否导致渗色、发雾、光泽变化或颜色改变。. - 6. 我们可以在包装上安全地宣称什么?
有用的答复应区分工艺用途、木材兼容性、户外展示、安全标签和经测试的性能证据。.
Preguntas frecuentes
Estas respuestas deben coincidir con el archivo de esquema Rank Math si se importa el esquema FAQPage.
1. 丙烯酸马克笔可以用于木材吗?
可以。丙烯酸马克笔在干净、干燥、轻微打磨的木材上表现良好。在批准包装宣称前,应测试原木、光泽涂层和粗糙纹理。.
2. 丙烯酸马克笔在木材上需要打底吗?
不一定。当木材吸水性很强、颜色深、表面粗糙,或浅色需要更亮覆盖时,打底或底漆会有帮助。.
3. 如何防止丙烯酸马克笔在木材上渗色?
打磨表面、清除灰尘、轻力度作画、薄层绘制,若木纹向外拉色,请测试底漆。.
4. 木材上的丙烯酸马克笔图案需要密封吗?
Selle el diseño si el artículo se manipulará, se venderá como decoración, se exhibirá al aire libre o se empaquetará en un kit de manualidades con expectativas de durabilidad. Pruebe siempre el sellador en una muestra primero.
5. ¿Se pueden usar marcadores de pintura acrílica sobre madera brillante?
Pueden funcionar después de probar la superficie, pero la madera brillante puede causar formación de gotas, rayones o mala adherencia. Puede ser necesaria una ligera preparación de la superficie o un recubrimiento diferente.
6. ¿Qué deben probar los compradores B2B antes de pedir marcadores para manualidades en madera?
Pruebe la opacidad, el borde de la línea, el desgaste de la punta, el tiempo de secado, el capeado, la compatibilidad con el sellador, el cambio de color, las instrucciones de empaque, el almacenamiento con tapa y los documentos de cumplimiento para el mercado objetivo.
Conclusión
Los marcadores de pintura acrílica sobre madera funcionan mejor cuando la superficie está preparada y las afirmaciones están controladas. Lije y limpie la madera, pruebe el marcador, pinte en capas finas, deje secar el diseño y selle solo con una capa transparente compatible. Ese proceso brinda a los usuarios un mejor resultado que tratar la madera como papel.
Para el abastecimiento, apruebe muestras de madera reales antes de realizar el pedido. El comprador debe revisar muestras de madera cruda y imprimada, muestras selladas, el texto de la tarjeta de instrucciones, las afirmaciones del empaque y los documentos de cumplimiento. Esa es la ruta práctica para un kit de marcadores para manualidades en madera que se vea bien en el estante y se comporte honestamente en las manos del cliente.
Guía relacionada: Para una verificación de control de calidad relacionada, consulte Cómo usar rotuladores de pintura acrílica sobre tela y lograr que el diseño perdure.