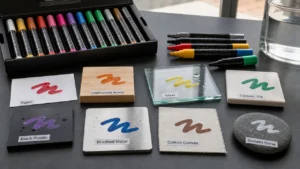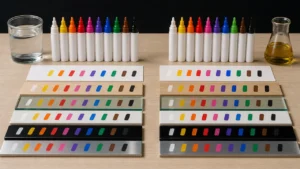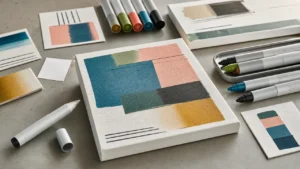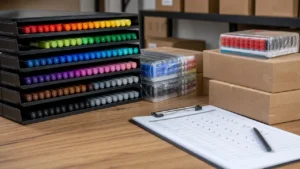
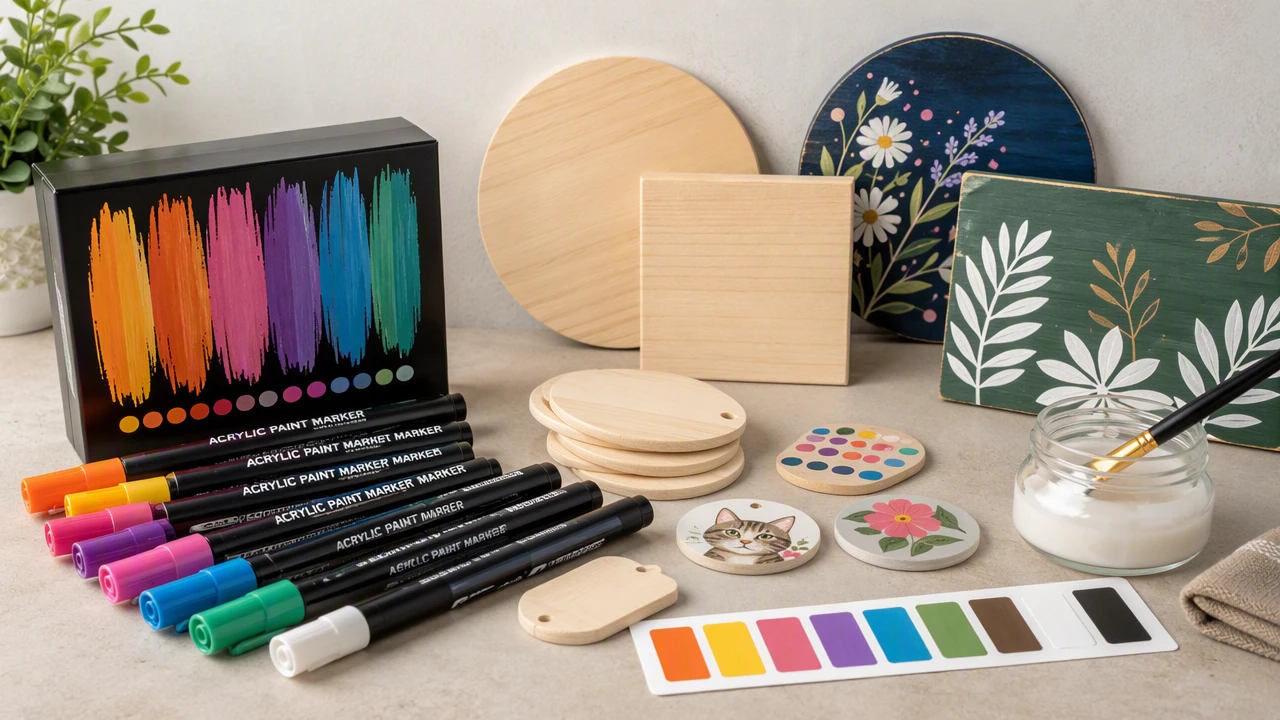
يمكن لأقلام الطلاء الأكريليكية على الخشب إنتاج لافتات وزخارف وبطاقات هدايا وصناديق وألعاب وديكورات منزلية نظيفة، لكن الخشب أقل تسامحًا من الورق. يمكن أن تؤثر عروق الخشب والغبار والرطوبة وعلامات الصنفرة والطلاء القديم جميعها على طريقة استقرار الطلاء على السطح. القلم الذي يبدو حادًا على الورق المطلي قد يتشعب على خشب الصنوبر الخام أو يتخطى على الخشب الرقائقي الخشن.
بالنسبة لمعظم مشاريع الحرف اليدوية ومشاريع البيع بالتجزئة، تُعد أقلام الطلاء الأكريليكية ذات الأساس المائي أفضل نقطة بداية. فهي أسهل في الاستخدام للهواة مقارنة بالأقلام الغنية بالمذيبات، وتعطي ألوانًا معتمة، وتعمل بشكل جيد مع تعليمات بسيطة: صنفرة، تنظيف، اختبار، طلاء بطبقات رقيقة، تجفيف، ثم عزل إذا كان المنتج سيُستخدم باليد. يمكن للمشترين الذين يقارنون أنظمة الحبر أيضًا مراجعة دليلنا أقلام الطلاء الأكريليكية مقابل أقلام الكحول.
تدعم ZH Stationery المشترين في التوريد أقلام طلاء أكريليك, ومجموعات الحرف اليدوية ذات العلامة الخاصة وبرامج الأقلام الجاهزة للتغليف. إذا كان خط منتجاتك يشمل زخارف خشبية أو مجموعات لافتات أو ألواح حرفية للأطفال أو بطاقات هدايا أو ديكورات DIY، استخدم هذا الدليل لتحديد سطح الخشب وطرف القلم ومجموعة الألوان وتعليمات العزل وفحوصات الجودة قبل الموافقة على العينات. بالنسبة لخطوط الحرف الحجرية المجاورة، يشرح دليلنا أقلام الطلاء للصخور كيف تتغير خيارات الأطراف والتجفيف وتوافق العازل على الأسطح المعدنية.
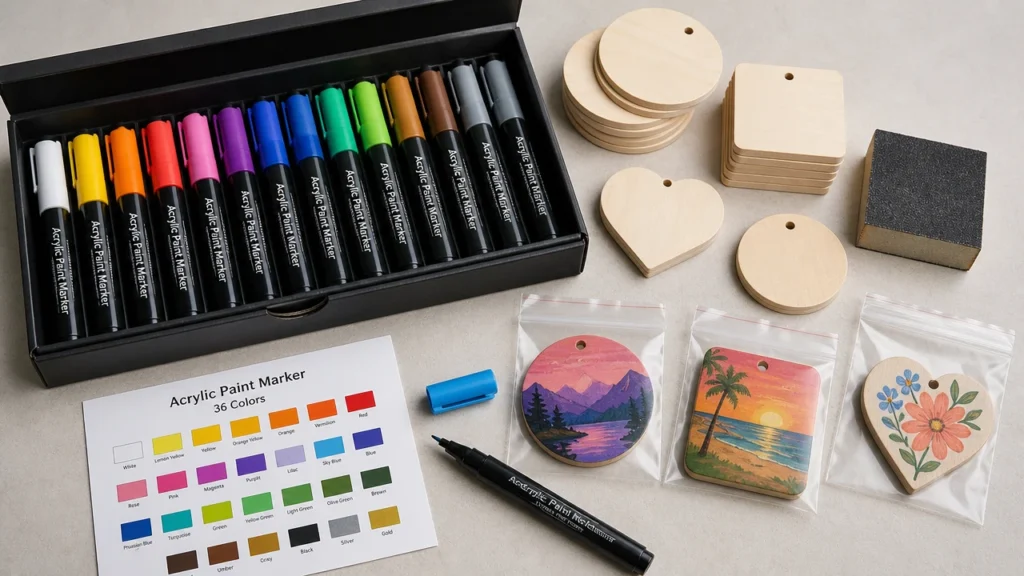
أقلام الطلاء الأكريليكية على الخشب: إجابة سريعة
تعمل أقلام الطلاء الأكريليكية بشكل أفضل على الخشب النظيف والجاف والمصنفر قليلاً. للخشب غير المعالج، قم بصنفرة السطح وإزالة الغبار واختبار القلم واستخدام طبقات رقيقة حتى لا يتشعب اللون في عروق الخشب. للخشب المطلي أو المعزول، اختبر الالتصاق أولاً لأن الطلاءات اللامعة يمكن أن تجعل الطلاء يتكتل أو يخدش أو يتقشر. اعزل التصميم النهائي بطبقة شفافة متوافقة إذا كان المنتج سيُستخدم باليد أو يُعرض في الخارج أو يُعبأ كمشروع حرفي للبيع بالتجزئة.
بالنسبة للتوريد من B2B، لا توافق على القلم من عينة ورقية فقط. اطلب عينات خشبية: خشب خام، خشب مصنفر، خشب مُجهز، خشب مطلي، وخشب معزول. ثم تحقق من العتامة وحافة الخط ووقت التجفيف وتوافق العازل ومقاومة الخدش وما إذا كانت بطاقة التعليمات تطابق العملية الفعلية.
روابط سريعة
- اختر القلم المناسب
- مقارنة أسطح الخشب
- جهّز الخشب قبل الطلاء
- ارسم بطبقات رقيقة ومنضبطة
- كيفية عزل أقلام الطلاء الأكريليكية على الخشب
- الأخطاء الشائعة
- تغليف مجموعات B2B والتحكم في الادعاءات
- اختبارات مراقبة الجودة
- اطرح أسئلة أفضل على المورد
- الأسئلة الشائعة
اختر القلم المناسب
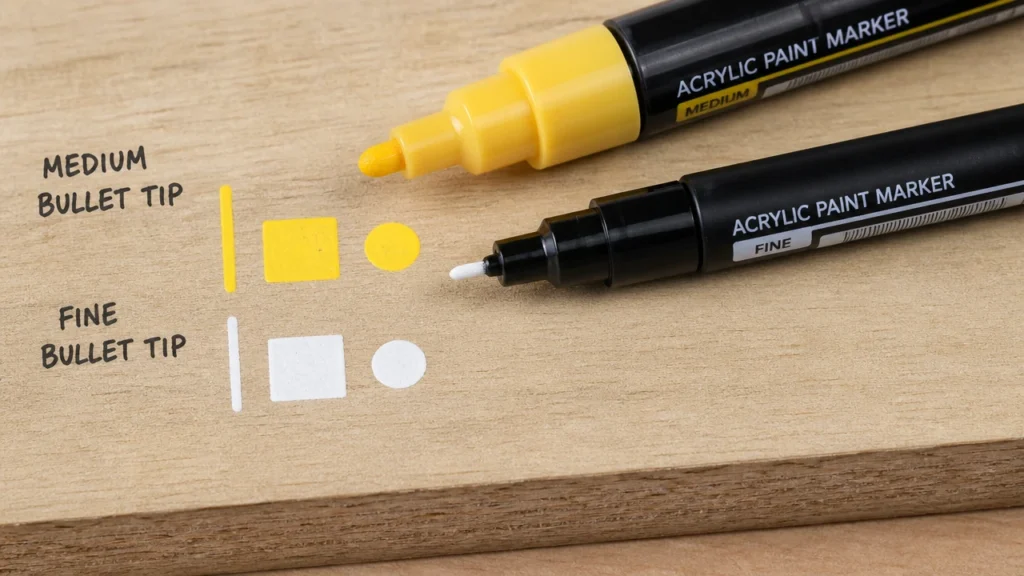
أفضل قلم للحرف الخشبية عادةً هو قلم طلاء أكريليكي ذو أساس مائي بصبغة قوية وتدفق ثابت وطرف يمكنه التعامل مع الملمس الخفيف. الطرف الرصاصي المتوسط هو الخيار الأكثر أمانًا للافتات والزخارف الخشبية العامة. الأطراف الدقيقة مفيدة للكتابة والتفاصيل، لكنها تعمل بشكل أفضل على الخشب الأملس. يمكن أن تكون الأطراف الفرشاة جذابة للورق أو القماش، لكن عروق الخشب الخشنة قد تتلفها بسرعة.
التحكم في التدفق مهم لأن الخشب يمكن أن يسحب الطلاء من الطرف بشكل غير متساوٍ. يمكن لنظام الصمام أن يساعد المستخدم على تجهيز القلم وإعادة تشغيل التدفق عند الحاجة. يشرح الدليل تقنية وضع العلامات بالضغط على الصمام لماذا تحتاج أقلام الرج والضغط إلى تعليمات مستخدم واضحة، خاصةً لأسطح الحرف اليدوية.
يمكن أن تعمل أقلام الحبر الزيتية على بعض مشاريع الخشب، لكنها قد تسبب رائحة وتجفيفًا أبطأ وحاجة إلى تحذيرات أقوى. أقلام الحبر الدائم العادية سهلة الاستخدام، لكن اللون قد يغوص في الخشب الخام ويبدو باهتًا. أقلام الكحول أفضل للرسم على الورق منها لتزيين الخشب المعتم.
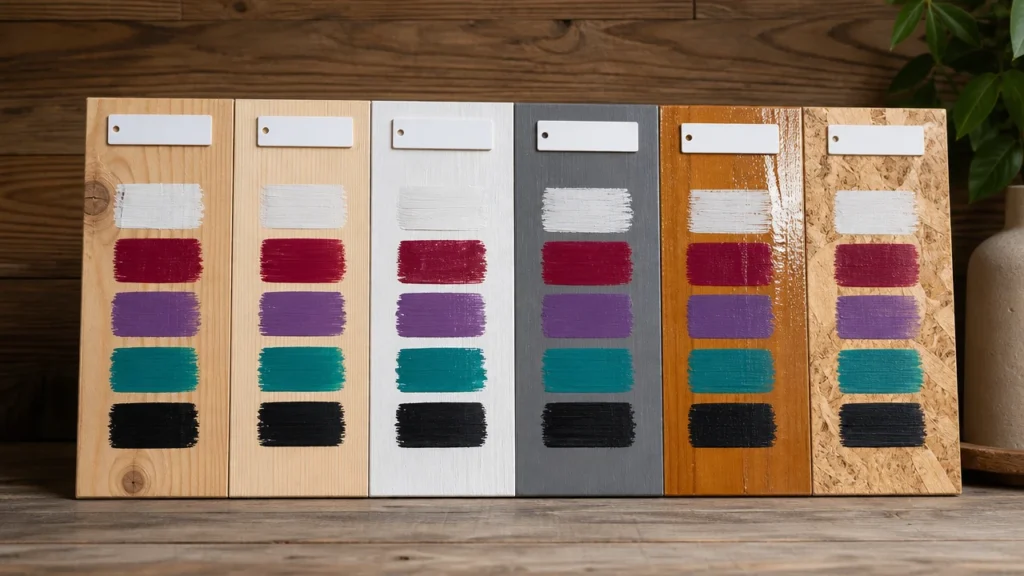
مقارنة أسطح الخشب
| سطح الخشب | سلوك القلم | توصية المشتري |
|---|---|---|
| خشب خام غير معالج | قد يمتص الطلاء في العروق ويتشعب عند الحواف | قم بالصنفرة والاختبار. فكر في طبقة أساسية للحصول على لون أكثر إشراقًا. |
| خشب خام مصنفر | خطوط أنظف وتغطية أكثر قابلية للتنبؤ | أفضل نقطة بداية لمعظم مجموعات الحرف الخشبية. |
| خشب مُجهز | لون أكثر إشراقًا وامتصاص أقل | جيد لصور المنتجات ومجموعات المبتدئين إذا ذكرت التعليمات التمهيدي. |
| خشب مطلي | يعمل إذا كان السطح غير لامع ونظيفًا | اختبر الالتصاق قبل الموافقة على ادعاءات التغليف. |
| خشب معزول لامع | قد يتكتل الطلاء أو يخدش أو يتقشر | قد تكون الصنفرة الخفيفة أو تجهيز السطح المناسب ضرورية. |
| فراغات حرفية من الخشب الرقائقي أو MDF | يمكن أن تعمل بشكل جيد، لكن الحواف والغبار يؤثران على النتائج | اختبر سطحي الوجه والحافة قبل الإنتاج بالجملة. |
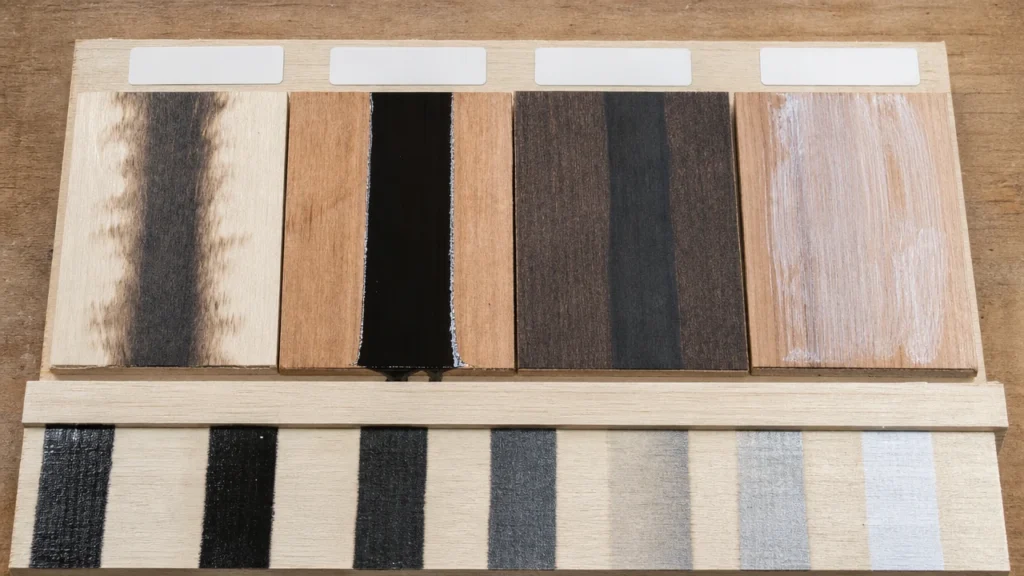
الدرس الرئيسي بسيط: الخشب ليس سطحًا واحدًا. القلم الذي يعمل على زخرفة خشب الزيزفون الناعم قد لا يتصرف بنفس الطريقة على خشب الصنوبر الخشن أو الخشب الرقائقي المطلي أو الألواح الزخرفية اللامعة. يجب أن تستخدم الموافقة على العينات نفس الفراغات الخشبية الفعلية التي سيستلمها العملاء.
جهّز الخشب قبل الطلاء
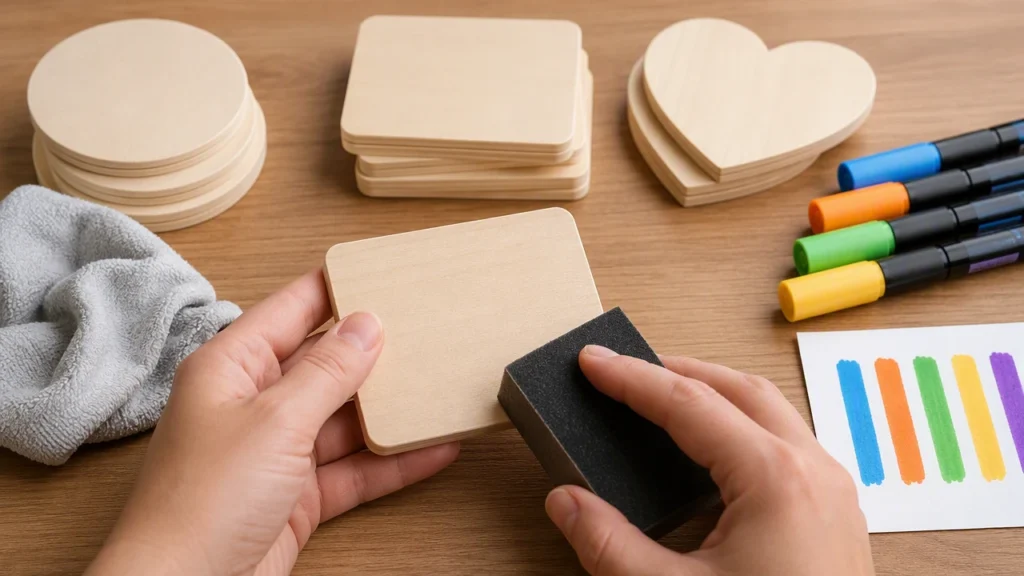
ابدأ بخشب نظيف وجاف. قم بصنفرة السطح برفق، ثم أزل الغبار بقطعة قماش جافة أو قطعة قماش لاصقة. الغبار المتبقي على الخشب يمكن أن يختلط بالطلاء ويجعل الخطوط تبدو متسخة. إذا كان الخشب دهنيًا أو مشمعًا أو لامعًا، فقد لا يلتصق القلم جيدًا دون تجهيز إضافي.
للحصول على لون أكثر إشراقًا، استخدم طبقة أساس أكريليك بيضاء أو شفافة واتركها تجف قبل الرسم. هذا مفيد بشكل خاص للألوان الباهتة والمعدنية والباستيل والكتابة الصغيرة. إذا كانت المجموعة لا تتضمن تمهيديًا، فلا تعرض عينات مُجهزة فقط في صور المنتج ما لم تشرح العبوة خطوة التجهيز تلك.
يجب أن تخبر بطاقة التعليمات الجيدة المستخدمين باختبار القلم على الجزء الخلفي من الخشب أو على قطعة إضافية أولاً. هذه الخطوة الصغيرة تمنع العديد من الشكاوى حول التشعب وضعف العتامة والتجفيف غير المتساوي.
ارسم بطبقات رقيقة ومنضبطة
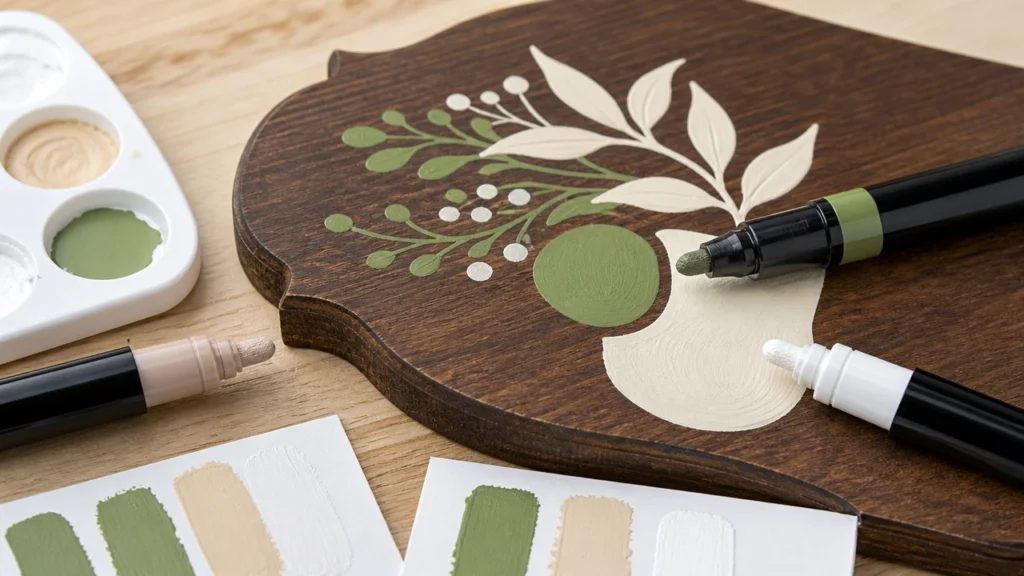
رجّ القلم وجهّزه على مادة خردة وابدأ بضغط خفيف. الضغط الثقيل يمكن أن يغمر الطرف ويدفع كمية كبيرة من الطلاء إلى عروق الخشب. الطبقات الرقيقة تجف بشكل أنظف وأسهل في العزل لاحقًا. للخشب الداكن، اترك الطبقة الأولى تجف قبل إضافة طبقة ثانية.
للكتابة، استخدم خشبًا أملسًا وحافظ على زاوية القلم ثابتة. للنقاط والأنماط الزخرفية الصغيرة، اختبر ما إذا كان الطرف يترك علامة دائرية نظيفة أم حافة ضبابية. للأشكال المعبأة، ارسم المخطط أولاً ثم املأ المركز بضربات متداخلة.
تخطيط الألوان مهم أيضًا للمجموعات. الأبيض والأسود والأحمر والأصفر والأزرق والأخضر والذهبي والفضي القياسية سهلة البيع للافتات الخشبية. الألوان المعدنية و أقلام تحديد أكريليك فائقة اللمعان يمكن أن تدعم الزخارف القابلة للإهداء ومجموعات الحرف الموسمية، لكن يجب على المشترين الموافقة على عينات خشبية منفصلة للألوان المؤثرة.
كيفية عزل أقلام الطلاء الأكريليكية على الخشب
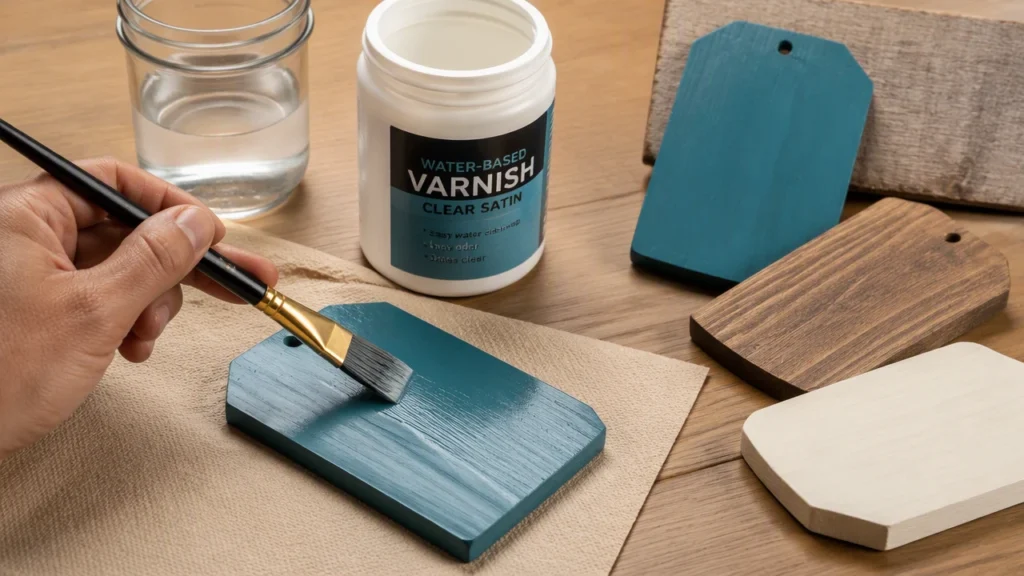
اترك تصميم القلم يجف تمامًا قبل العزل. ثم اختبر ورنيش أكريليك شفاف متوافق أو بولي يوريثان ذو أساس مائي أو طبقة عزل حرفية شفافة على قطعة عينة. ضع طبقات رقيقة بدلاً من طبقة واحدة ثقيلة. العازل الثقيل يمكن أن يلين الطلاء الطازج أو يسحب اللون أو يخلق مناطق ضبابية أو يتجمع في عروق الخشب.
العوازل بالفرشاة تعطي تحكمًا أكبر لقطع الحرف الصغيرة والمجموعات الداخلية. العوازل بالرش يمكن أن تغطي بالتساوي، لكن يجب على المستخدمين اتباع ملصق العازل واستخدام تهوية مناسبة. لمجموعات الحرف الموجهة للأطفال، كن حذرًا في الصياغة. يمكن لمجموعة الأقلام أن توضح أن المستخدمين البالغين قد يعزلون القطعة النهائية بشكل منفصل، لكن لا ينبغي أن توجه الأطفال بشكل عابر لرش الطلاءات.
The اعزل في طبقات خفيفة بدلاً من طبقة واحدة مبللة. يمكن أن تعيد الطبقات الثقيلة تنشيط طبقات القلم وتتجمع حول نسيج الحجر أو تترك لمسة نهائية ضبابية. اترك كل طبقة تجف قبل إضافة التالية. للصخور الخارجية، اختبر عينة واحدة في الخارج قبل طباعة ادعاء متانة قوي. يلاحظ أن مثبتات الرش قد تحتوي على مذيبات خطرة عند استنشاقها ويوصي ببدائل أكثر أمانًا حيثما أمكن. استخدم لغة تغليف حذرة واترك ملصق العازل يتحكم في تعليمات السلامة.
عازل أكريليك شفاف خارجي عندما يكون المنتج موجهًا لصخور الحدائق.
- ورنيش أكريليك شفاف للزخارف واللافتات الخشبية الداخلية.
- بولي يوريثان ذو أساس مائي للألواح الحرفية التي تُستخدم باليد عندما يكون متوافقًا مع القلم.
- تشطيب غير لامع عندما يريد المشتري مظهرًا طبيعيًا مصنوعًا يدويًا.
- تشطيب لامع عندما يريد المشتري لونًا أكثر إشراقًا في تصوير المنتج.
- طبقة عزل شفافة مقاومة للخارج فقط عندما يتم اختبار نظام القلم النهائي بالإضافة إلى العازل للادعاء.
الأخطاء الشائعة
معظم حالات الفشل تأتي من تجهيز السطح، وليس من القلم وحده. الخشب الخام يمكن أن يمتص الطلاء. الغبار يمكن أن يكسر الخط. الطلاء اللامع يمكن أن يرفض الطلاء. الطلاء الرطب يمكن أن يلطخ تحت العازل. السطح الخشن يمكن أن يتلف الأطراف الدقيقة. غالبًا ما تصف مراجعات المنتجات هذه كعيوب في القلم، لكن السبب الجذري قد يكون السطح والتعليمات.
| الخطأ | ماذا يحدث | إرشادات أفضل |
|---|---|---|
| طلاء الخشب المترب | يبدو اللون متسخًا أو غير متساوٍ | قم بالصنفرة الخفيفة وإزالة الغبار قبل وضع العلامات. |
| استخدام ضغط مفرط | يفيض رأس القلم أو تتشوش حواف الخط | جرّب على قطعة خشب فارغة وارسم بضغط خفيف. |
| الختم مبكرًا جدًا | يلطخ الطلاء أو يرتفع أو يصبح غائمًا | اترك التصميم يجف تمامًا قبل اختبار المادة الختامية. |
| استخدام خشب مطلي بطبقة لامعة دون اختبار | يتقاطر الطلاء أو يُخدش | اختبر الالتصاق أو جهّز السطح بخفة أولاً. |
| الموافقة على عينات ورقية فقط | أداء الخشب غير معروف | اطلب عينات خشب حقيقية قبل الموافقة على الطلب. |
| إطلاق ادعاءات خارجية واسعة النطاق | توقعات العملاء تتجاوز أدلة الاختبار | استخدم ادعاءات محدودة مرتبطة بتعليمات الختم والمعالجة. |
تغليف مجموعات B2B والتحكم في الادعاءات
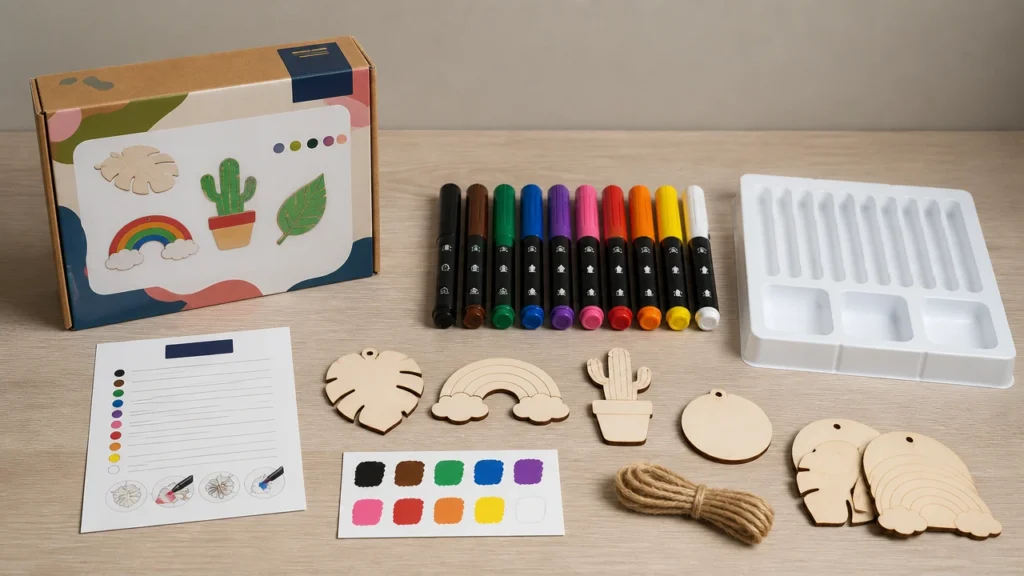
يجب أن تبيع مجموعة أقلام الحرف الخشبية العملية بوضوح. اعرض عينات خشب حقيقية، وليس فقط صورًا رقمية. أدرج بطاقة تعليمات تتضمن إرشادات الصنفرة وإزالة الغبار والتحضير والتجفيف والطبقات والختم والتخزين. إذا كانت المجموعة تتضمن قطعًا خشبية فارغة، فاختبر تلك القطع بالضبط مع القلم قبل الإنتاج الضخم.
مساحة التغليف مهمة. يمكن خيارات تغليف أقلام الأكريليك أن يساعد الدليل المشترين في تخطيط بطاقات التعليمات وبطاقات العينات ولوحات التحذير والصواني وأطراف الاستبدال وملصقات الكرتون. إذا كانت المجموعة موجهة لأمازون أو أرفف التجزئة، فيجب على المشتري أيضًا تحديد ما إذا كانت مقدمة الصندوق تقول حرف خشبية أو زينة خشبية أو لافتات خشبية أو أقلام أكريليك متعددة الأسطح.
من أجل السلامة والامتثال، لا تتعامل مع ادعاءات الأداء وملصقات السلامة كشيء واحد. يوضح دليل مواد الفنون أن مواد الفنون تحتاج إلى تقييم سمّي، بينما ASTM D-4236標籤規範 يغطي ممارسة وضع العلامات على المخاطر المزمنة. توفر ACMI أيضًا خلفية من خلال نظرة عامة على لوائح ACMI و ACMI材料安全頁面 .
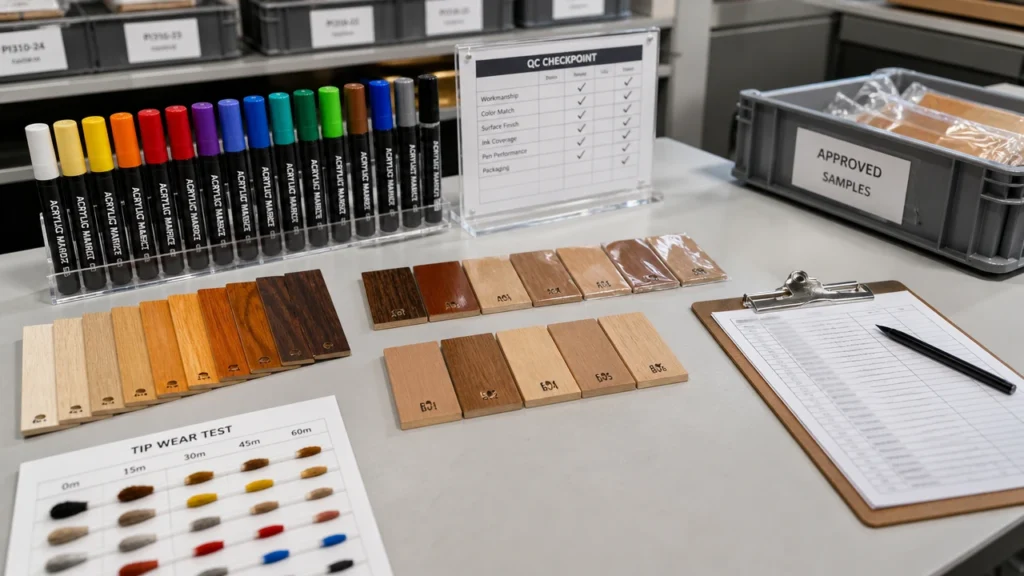
اختبارات مراقبة الجودة لأقلام الحرف الخشبية
يجب أن يحاكي اختبار عينة قلم الخشب حالة الاستخدام الحقيقية للعميل. اختبر الخشب الخام والمصنفر والمجهز والمطلي والمختوم. جرّب الألوان الفاتحة والداكنة والمعدنية وأي تأثيرات لامعة. تحقق من حافة الخط والعتامة ووقت التجفيف والطبقات وتوافق المادة الختامية وتخزين الغطاء وتآكل الرأس على الخشب المحبب.
| QC檢查點 | 檢查項目 | لماذا هو مهم |
|---|---|---|
| 不透明度 | الأبيض والأصفر والباستيل والمعدني والأسود على الخشب الخام والمجهز | يمكن أن تبدو الألوان الضعيفة سيئة في صور المنتج ومشاريع المستخدمين. |
| 線條邊緣 | التشوش على الخشب الخام والنعومة على الخشب المصنفر | يمكن أن يجعل نسيج الخشب الحروف تبدو ضبابية. |
| 流量 | التحضير الأولي وإعادة التشغيل بعد التخزين والتحكم في النقاط واتساق الخط | التدفق غير المتساوي يسبب بقعًا وضربات جافة وشكاوى. |
| تآكل رأس القلم | الأطراف الدقيقة والمتوسطة على الخشب الأملس والقطع الخشنة | يمكن أن يتلف الخشب الخشن الأطراف أسرع من الورق أو القماش. |
| 乾燥 | وقت الجفاف عند اللمس قبل الطبقة الثانية وقبل الإغلاق | الختم المبكر جدًا يمكن أن يلطخ العمل الفني أو يرفعه. |
| التوافق مع المادة المانعة للتسرب | طبقات الطلاء الشفافة بالفرشاة والرش على قطع العينات | بعض المواد الختامية يمكن أن تسحب الصبغة أو تعكر اللمسة النهائية. |
قبل الموافقة على طلب بعلامة خاصة، اطلب عينات محفوظة وعينات إنتاج. لوحة صفحة الشهادات, جولة في المصنع, و من نحن 頁面為買家審查提供證明和工廠背景。.
اطرح أسئلة أفضل على المورد
يجب أن يصف الرد المفيد من المورد اختبار الخشب ونظام الأقلام وادعاء التغليف. قول "نعم" في الكتالوج ليس كافيًا.
- 1. أي أسطح خشبية اختبرتها؟
يفصل الرد المفيد بين الخشب الخام والخشب المصنفر والخشب المجهز والخشب المطلي والخشب المختوم بطبقة لامعة وMDF والخشب الرقائقي والقطع المحددة المستخدمة في المجموعة. - 2. أي رأس قلم هو الأفضل للافتات أو الزينة الخشبية؟
يشرح الرد المفيد المفاضلات بين الأطراف المتوسطة والدقيقة والدقيقة جدًا ويذكر تآكل الأطراف على الخشب المحبب. - 3. هل يحتاج القلم إلى برايمر أو طبقة أساس؟
يوضح الرد المفيد متى يساعد البرايمر، خاصة للألوان الفاتحة والمعدنية والخشب الداكن أو الأسطح شديدة الامتصاص. - 4. كم من الوقت يجب أن ينتظر المستخدمون قبل الختم؟
يقدم الرد المفيد توصية عملية بوقت التجفيف واختبار العينة دون الوعد بوقت موحد لجميع أنواع الخشب والمناخات. - 5. أي مادة ختامية اختبرتها مع القلم؟
يتضمن الرد المفيد عينات مختومة ويشرح ما إذا كانت المادة الختامية تسببت في النزيف أو التعكير أو تغير اللمعان أو تغير اللون. - 6. ما الادعاءات التي يمكننا وضعها بأمان على التغليف؟
يفصل الرد المفيد بين الاستخدام الحرفي وتوافق الخشب والعرض الخارجي وملصقات السلامة وأدلة الأداء المختبرة.
الأسئلة الشائعة
يجب أن تتطابق هذه الإجابات مع ملف مخطط Rank Math إذا تم استيراد مخطط FAQPage.
1. هل يمكن استخدام أقلام الأكريليك على الخشب؟
نعم. يمكن أن تعمل أقلام الأكريليك بشكل جيد على الخشب النظيف والجاف والمصنفر بخفة. يجب اختبار الخشب الخام والطلاءات اللامعة والحبيبات الخشنة قبل الموافقة على ادعاءات التغليف.
2. هل تحتاج أقلام الأكريليك إلى برايمر على الخشب؟
ليس دائمًا. يساعد البرايمر أو الطبقة الأساسية عندما يكون الخشب شديد الامتصاص أو داكنًا أو خشنًا أو عندما تحتاج الألوان الفاتحة إلى تغطية أكثر إشراقًا.
3. كيف تمنع أقلام الأكريليك من النزيف على الخشب؟
قم بصنفرة السطح وإزالة الغبار واستخدم ضغطًا خفيفًا وارسم بطبقات رقيقة واختبر طبقة أساس إذا كان نسيج الخشب يسحب اللون إلى الخارج.
4. هل يجب ختم تصاميم أقلام الأكريليك على الخشب؟
اختم التصميم إذا كانت القطعة ستُستخدم أو تُباع كديكور أو تُعرض في الخارج أو تُعبأ في مجموعة حرفية مع توقعات بالمتانة. اختبر دائمًا المادة الختامية على عينة أولاً.
5. هل يمكن استخدام أقلام الأكريليك على الخشب اللامع؟
قد تعمل هذه الأقلام بعد اختبار السطح، لكن الخشب اللامع قد يسبب تكوّن حبيبات، أو خدوشًا، أو ضعفًا في الالتصاق. قد تكون هناك حاجة إلى تجهيز بسيط للسطح أو طبقة طلاء مختلفة.
6. ما الذي يجب على المشترين اختباره قبل طلب أقلام تحديد الحرف الخشبية؟
اختبر درجة التعتيم، حدة الخط، تآكل الرأس، زمن الجفاف، التطبيق الطبقي، توافق المادة العازلة، تغيّر اللون، تعليمات التغليف، تخزين الغطاء، ومستندات المطابقة للسوق المستهدف.
الاستنتاج
تعمل أقلام الأكريليك على الخشب بشكل أفضل عندما يكون السطح مُجهزًا وتكون الادعاءات مضبوطة. قم بصنفرة الخشب وتنظيفه، واختبر القلم، واطلِ بطبقات رقيقة، واترك التصميم ليجف، ولا تعزله إلا بطبقة شفافة متوافقة. هذه العملية تمنح المستخدمين نتيجة أفضل من معاملة الخشب كالورق.
بالنسبة للتوريد، اعتمد عينات الخشب الحقيقية قبل الطلب. يجب على المشتري مراجعة عينات الخشب الخام والمجهز، والعينات المعزولة، ونص بطاقة التعليمات، وادعاءات التغليف، ومستندات المطابقة. هذا هو المسار العملي للحصول على مجموعة أقلام حرف خشبية تبدو جيدة على الرف وتتصرف بصدق في يد العميل.
الدليل ذو الصلة: لفحص مراقبة الجودة ذي الصلة، راجع كيفية استخدام أقلام الطلاء الأكريليكية على القماش وجعل التصميم يدوم طويلاً.