How to blend alcohol markers for beginners is easier when beginners stop trying to force a perfect gradient in one pass. Alcohol marker blending depends on paper, ink timing, pressure, color distance, and how quickly the user works while the ink is still open.
For a brand, importer, or distributor, this topic is more than a drawing lesson. If the markers are sold to beginners, the set should include clear color families, suitable tips, simple practice instructions, and packaging claims that match real user experience. A poor beginner experience can turn into reviews about streaking, dried tips, muddy colors, or “markers that do not blend.”
ZH Stationery supports alcohol marker sourcing and private label programs across different retail channels. Buyers can compare this guide with the alcohol marker manufacturer guide, the beginner marker techniques article, and current product categories before building a beginner-friendly marker line.
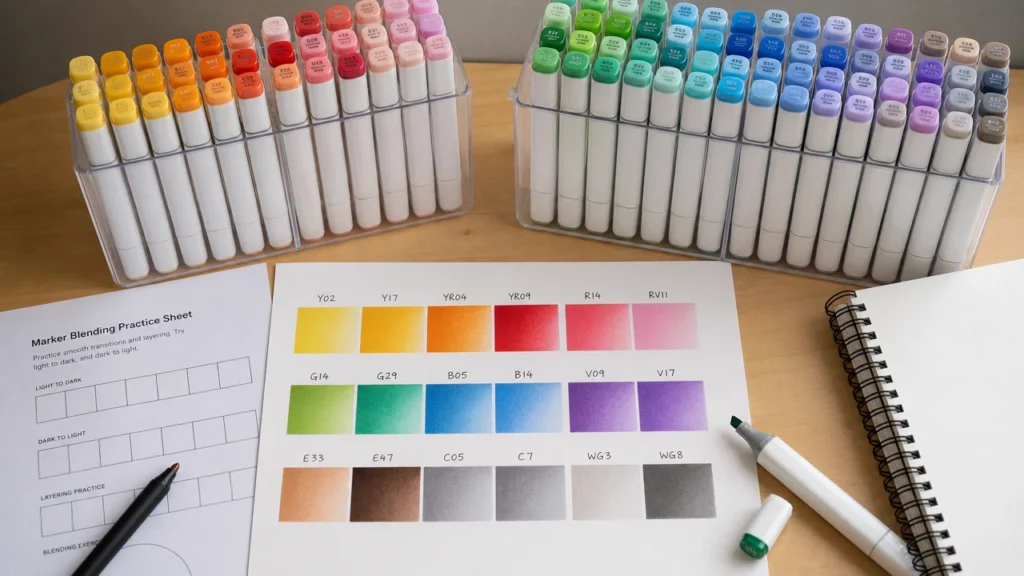
How to Blend Alcohol Markers for Beginners: Quick Answer
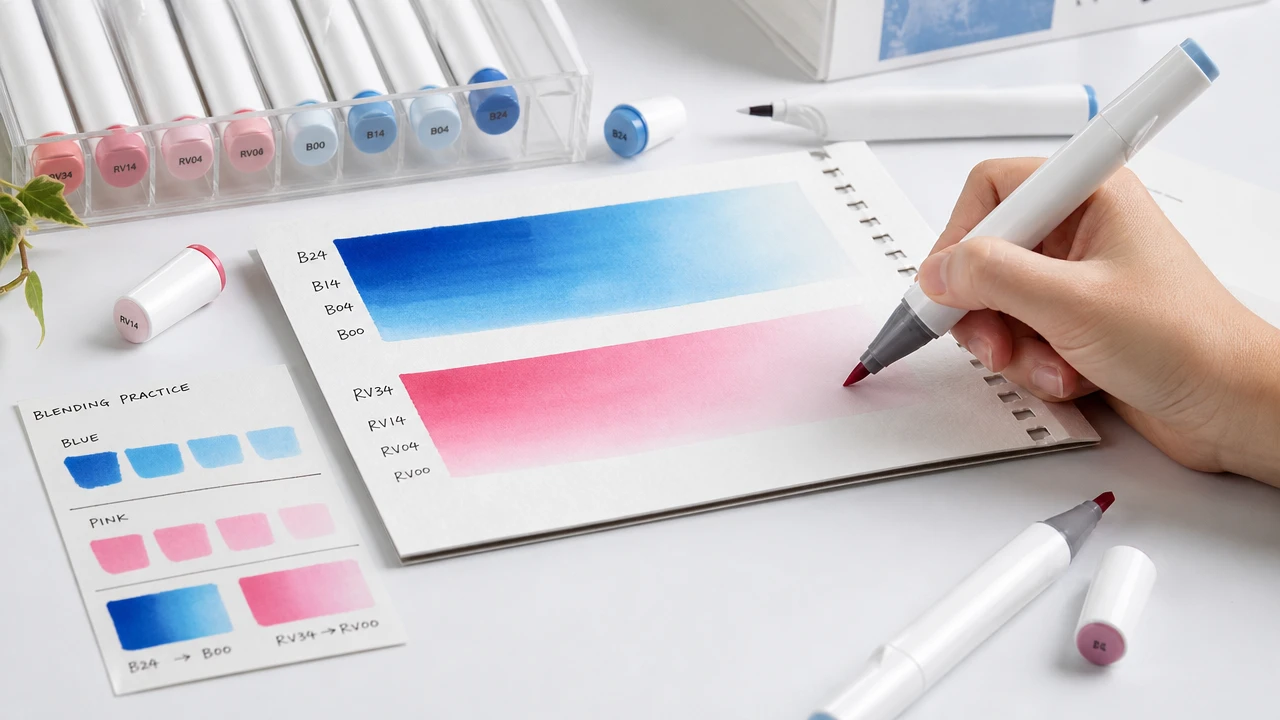
Use smooth marker paper, choose two or three close colors, start with the lightest color, add the darker shade while the first layer is still damp, then return with the lighter color to soften the edge. Beginners should practice small gradients first instead of trying to blend a full illustration.
The five most reliable techniques are light-to-dark layering, tip-to-tip transfer, palette pickup with a colorless blender, feathering, and small overlap passes before the ink dries. For B2B buyers, these techniques also become sample-test methods. If a beginner cannot create a basic two-color blend with the sample set, the problem may be paper, nib softness, ink flow, color spacing, or user instructions.
Quick Links
- What Makes Alcohol Markers Blend Differently
- Technique 1: Light-to-Dark Layering
- Technique 2: Tip-to-Tip Transfer
- Technique 3: Palette Pickup With a Colorless Blender
- Technique 4: Feathering for Smooth Edges
- Technique 5: Small Overlap Passes Before the Ink Dries
- Paper, Nib, and Ink Variables Buyers Should Test
- Beginner Practice Sheet for Retail Kits
- Ask Better Supplier Questions
- FAQs
What Makes Alcohol Markers Blend Differently
Alcohol markers blend because the solvent helps new ink move into the layer already on the paper. That is why timing matters. If the first layer is still damp, a second color can soften into it. If the first layer is fully dry, the next pass may sit on top, create a hard edge, or darken the area instead of blending smoothly.
Paper changes the result. Thin copy paper absorbs ink quickly and can feather through the fibers. Coated marker paper keeps more ink near the surface and gives beginners more working time. For retail kits, one small practice sheet can prevent many complaints because it shows users what kind of surface the markers were designed for.
Tip design matters too. A soft brush tip helps users feather color into a highlight area. A chisel tip can fill larger zones. A fine tip is useful for line work but is harder for broad blending. Buyers comparing samples should include a blending test in the sample approval checklist instead of judging only the printed barrel and packaging.
Technique 1: Light-to-Dark Layering
Light-to-dark layering is the safest starting method. Pick two colors from the same family, such as pale blue and mid blue. Fill the full shape with the lighter color. Add the darker color only where the shadow should be. Then use the lighter marker again to pull the edge back toward the middle.
The mistake beginners make is choosing colors that are too far apart. A pale yellow and a deep purple will not become a clean beginner gradient. They will usually make a harsh edge or a muddy overlap. A retail beginner set should include obvious pairing families so the user can practice without guessing.
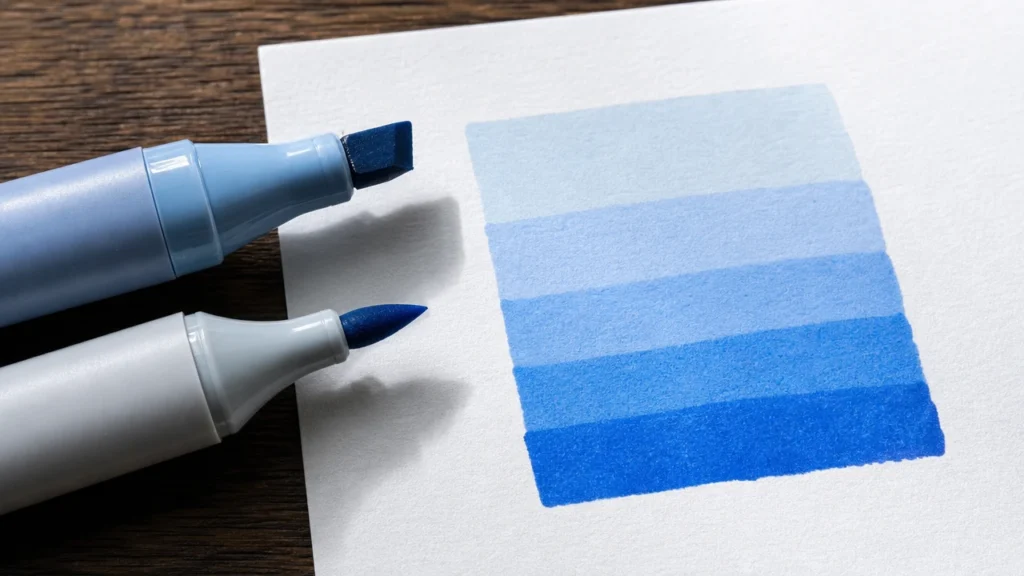
| Step | Beginner Action | Buyer or Supplier Check |
|---|---|---|
| 1 | Lay down the lightest color first. | Check whether the light shade is readable but not too dry. |
| 2 | Add the darker color at the shadow edge. | Check ink flow consistency at the brush or chisel tip. |
| 3 | Return with the light color and overlap the edge. | Check whether the transition softens without heavy streaking. |
| 4 | Stop before the paper becomes oversaturated. | Check whether instructions warn against too many passes. |
Technique 2: Tip-to-Tip Transfer
Tip-to-tip transfer works when a beginner wants a small gradient from one marker. Touch the darker marker tip lightly to the lighter marker tip, then draw with the lighter marker. The first stroke carries a little darker ink, and the color fades as the lighter marker continues.
This method is useful for flower petals, small lettering, icons, and compact craft illustrations. It also helps buyers test whether nibs recover cleanly after color contact. A good sample should not stain permanently after a short transfer test, although exact behavior depends on ink formula and color strength.
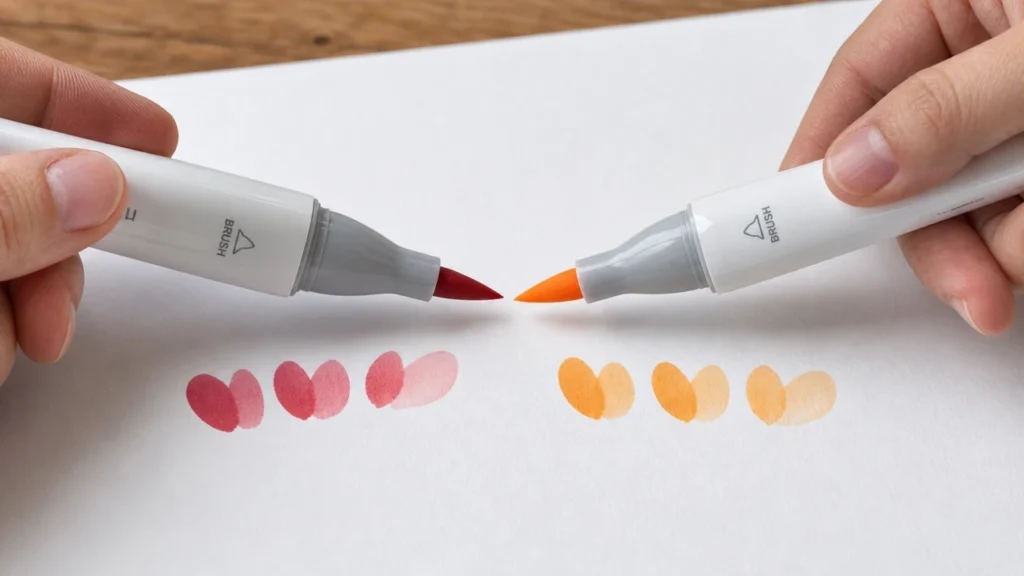
For private label packaging, explain this method carefully. Users should touch tips briefly, use close colors, and test on scrap paper first. Overloading the nib with a very dark color can make the first few strokes too strong.
Technique 3: Palette Pickup With a Colorless Blender
A colorless blender is often misunderstood. It is not an eraser. It moves and dilutes alcohol marker ink, which can push pigment, soften a highlight, or create a lighter start to a stroke. Beginners get better results when they use it on a plastic palette or laminated sheet instead of rubbing the paper too hard.
To use palette pickup, scribble a darker marker onto a smooth plastic surface. Touch the colorless blender or a pale marker into that ink, then draw onto the paper. The color starts stronger and fades as the picked-up ink runs out. This gives beginners a controlled small gradient without flooding the paper.
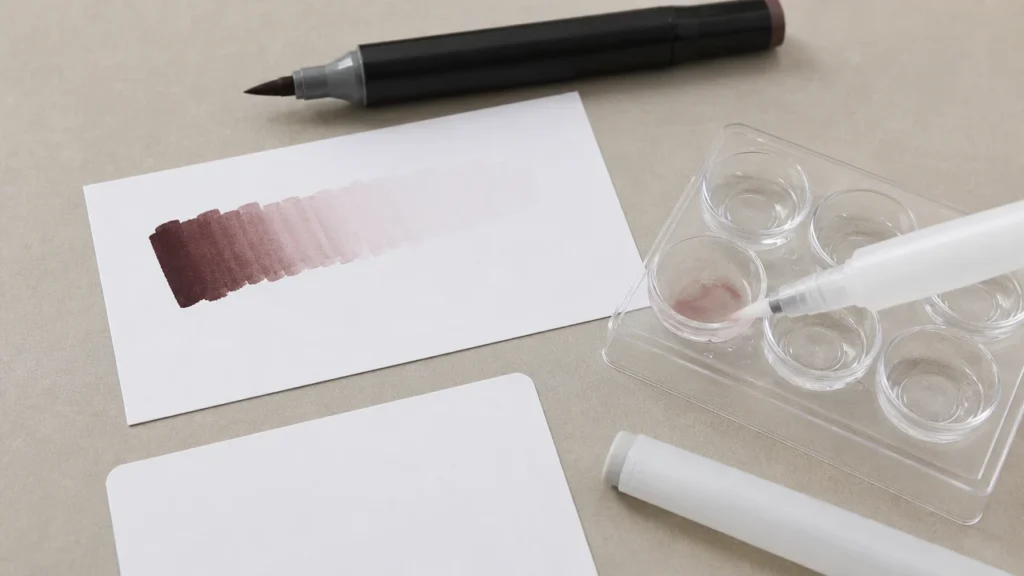
Buyers should avoid promising that a blender can fix every mistake. It cannot restore damaged paper fibers. It also cannot turn incompatible paper into marker paper. The safer product claim is that it helps soften, lift, and move alcohol-marker color when used on a suitable surface. For US art materials, review CPSC art materials guidance and supplier labeling documents rather than treating blending performance as a safety statement.
Technique 4: Feathering for Smooth Edges
Feathering means flicking the marker from the dark area into the light area with light pressure. The stroke starts wider or darker, then lifts off before it reaches the highlight. It works well with brush tips because the tip can flex and taper naturally.
Beginners should practice feathering in one direction first. For a leaf, start at the center vein and flick outward. For hair or fabric folds, follow the shape instead of drawing straight bands. The goal is not to hide every stroke. It is to make the stroke direction look intentional.
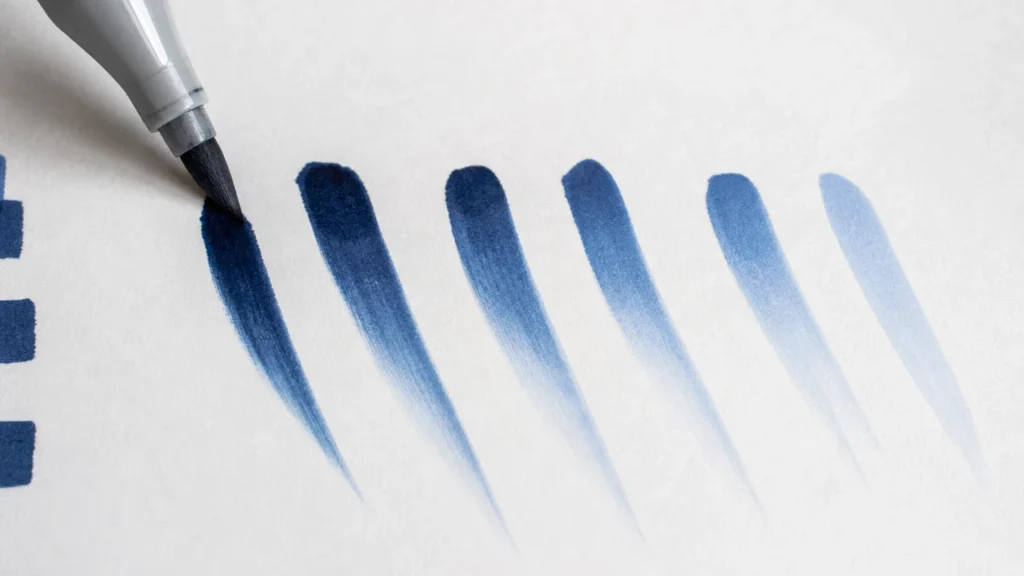
For sourcing teams, feathering is a practical brush-tip test. If the tip is too stiff, beginners may get blocky marks. If the tip is too soft or poorly mounted, it may fray early. Add a simple feathering grid to sample approval so the team can compare nib feel across batches.
Technique 5: Small Overlap Passes Before the Ink Dries
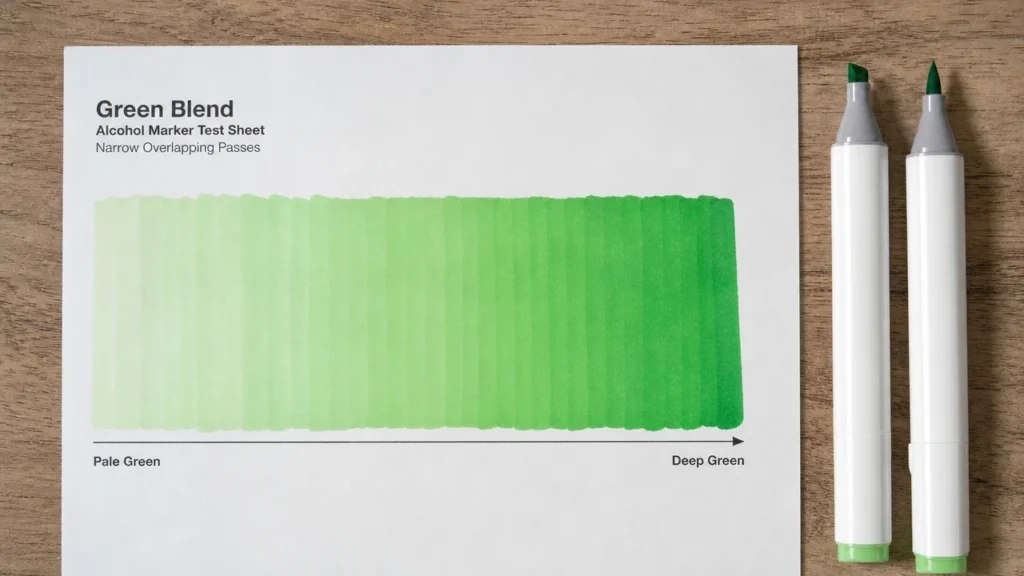
Small overlap passes help beginners blend larger areas without soaking the paper. Work in narrow bands. Color the first band with the light marker, add the second band while the first is still damp, then overlap the border by a few millimeters. Continue across the shape instead of filling the whole area and returning later.
This method reduces hard edges because each new pass meets wet ink. It also teaches a realistic speed. Alcohol markers dry quickly, so waiting too long between passes makes blending harder. Beginners who understand timing are less likely to blame the marker for every edge.
| Problem | Likely Cause | Fix for the User | What Buyers Should Check |
|---|---|---|---|
| Hard stripe between colors | First layer dried before the second pass. | Work in smaller zones and overlap sooner. | Include practice instructions in the kit. |
| Muddy middle area | Colors are too far apart or overworked. | Use closer shades and fewer passes. | Review palette planning before mass production. |
| Paper pilling | Too much solvent on weak paper. | Switch to marker paper and reduce rubbing. | Add recommended paper notes on packaging. |
| Uneven fill | Ink flow, pressure, or paper absorption varies. | Use steadier pressure and rotate the paper. | Test nib flow and cap sealing during QC. |
Paper, Nib, and Ink Variables Buyers Should Test
A beginner blending guide is useful, but it cannot compensate for a badly matched product. Buyers should test paper compatibility, color spacing, cap fit, nib mounting, and ink flow before approving artwork or a large order. The same two colors should be tested on copy paper, marker paper, sketch paper, and any paper included in a retail kit.
Use marker quality control checks for cap sealing and dry-out risk. Then test whether the marker starts quickly after storage, whether both tips receive ink evenly, and whether the same blend can be repeated across several pieces from the sample batch. If the product targets children or consumer art use, verify labeling and documents through the certifications page and current supplier reports.
ASTM D4236 labeling practice covers precautionary labeling for art materials, while ACMI regulations overview explains the regulatory background for art-material labeling. These sources do not prove blending quality. They help buyers separate safety-label obligations from performance claims.
| Variable | Why It Affects Blending | Sample Approval Check |
|---|---|---|
| Paper | Absorption controls working time and edge softness. | Blend the same two colors on each target paper. |
| Nib shape | Brush, chisel, and fine tips behave differently. | Run feathering, fill, and line tests with both tips. |
| Ink flow | Too dry streaks, too wet floods the paper. | Compare first stroke, tenth stroke, and restarted stroke. |
| Color spacing | Close shades blend more easily for beginners. | Check each suggested beginner pair. |
| Cap seal | Poor sealing makes blending worse over storage. | Test after horizontal and vertical storage where relevant. |
Beginner Practice Sheet for Retail Kits
A small printed practice sheet can make a beginner alcohol marker set easier to sell and easier to support. It should show five exercises: a two-color rectangle, a three-color sphere, a tip-to-tip petal, a feathering strip, and an overlap-pass gradient. Keep the sheet simple enough that a new user can finish it in ten minutes.
For brands and distributors, this sheet can also act as a quality reference. The factory sample, approval sample, and first shipment can all be checked with the same exercises. That gives the buyer a practical way to discuss blending quality without relying only on subjective comments.
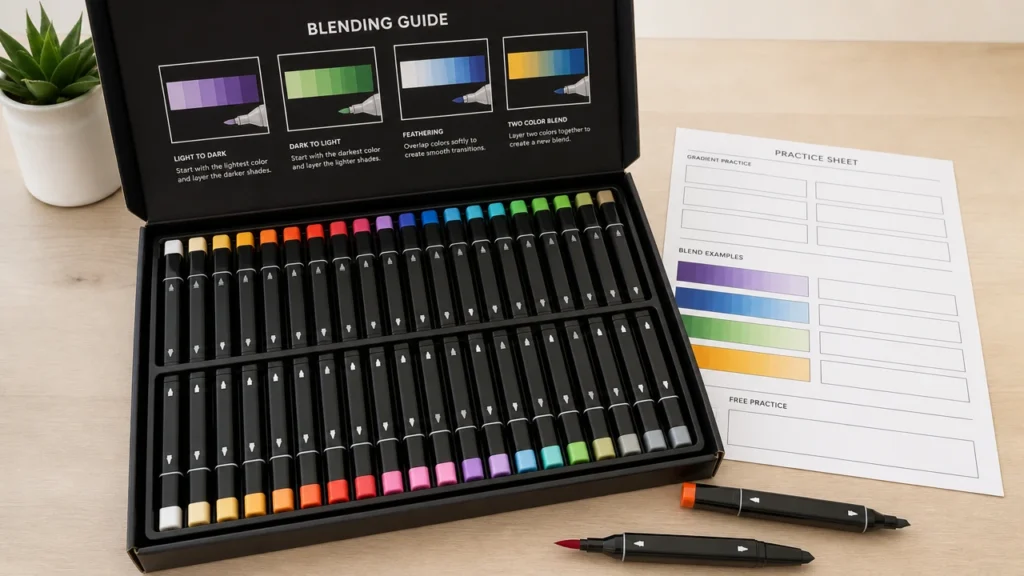
If the product line will include several marker types, compare alcohol marker education with advanced marker techniques and adjacent products such as the custom acrylic marker sourcing guide. The instruction sheet should match the actual ink system, not a generic marker promise.
Ask Better Supplier Questions
Supplier questions should lead to evidence, not just a yes. For beginner blending performance, ask questions that connect the ink, nib, paper, packaging, and user instructions.
- 1. Which two or three colors in this set should a beginner use for the first blending exercise?
A useful answer names exact color codes or barrel numbers and explains why they sit close enough for a smooth gradient. - 2. What paper did you use when evaluating the blending sample?
A useful answer identifies the paper type or GSM and does not imply that every cheap paper will perform the same way. - 3. Can you provide a brush-tip feathering sample and a chisel-tip fill sample?
A useful answer includes physical or photo evidence from the sample batch, not only a catalog image. - 4. How do you check cap sealing before shipment?
A useful answer describes an inspection step tied to dry-out prevention and should connect with the buyer’s storage and shipping plan. - 5. Can the retail kit include a beginner practice sheet or printed blending card?
A useful answer confirms artwork format, packaging placement, language version, and whether the sheet affects carton layout. - 6. What labeling documents apply to the target market?
A useful answer separates art-material labeling, children’s product requirements, and buyer-specific marketplace documents instead of giving one generic certificate.
FAQs
1. What is the easiest way to blend alcohol markers for beginners?
Start with two close colors on marker paper. Fill the shape with the lighter color, add the darker color while the first layer is still damp, then return with the lighter color to soften the edge.
2. Do beginners need a colorless blender?
No. A colorless blender helps with small fades, palette pickup, and softening edges, but beginners can learn the core method with two close colors and suitable paper.
3. Why do my alcohol markers leave streaks?
Streaking usually comes from dry paper, slow overlap timing, uneven pressure, a color gap that is too large, or ink flow that is not consistent. Test the same colors on marker paper before judging the marker.
4. Can alcohol markers blend on normal copy paper?
They can make color transitions on copy paper, but the result is usually less controlled. Copy paper absorbs ink quickly and may bleed or feather, so marker paper gives beginners a better chance of a smooth blend.
5. What should B2B buyers test before approving beginner alcohol marker sets?
Test color pairs, brush-tip feathering, chisel-tip filling, cap sealing, restart after storage, paper compatibility, and the clarity of the instruction sheet.
6. Does ASTM D4236 prove that alcohol markers blend well?
No. ASTM D4236 relates to precautionary labeling for art materials. It does not prove blending performance, nib quality, ink flow, or paper compatibility.
Conclusion
How to blend alcohol markers for beginners comes down to a few habits: use suitable paper, keep colors close, work while the ink is still damp, and avoid overworking the same area. For a buyer, the same five techniques also reveal whether a beginner marker set is easy to use, easy to explain, and ready for retail support.
If you are building a private label alcohol marker set, send ZH Stationery your target user, color count, packaging format, destination market, and sample requirements. The team can help compare marker options, beginner practice materials, and packaging details through the factory tour and company background on who we are.
Related Reading
- Acrylic Paint Markers vs Alcohol Markers: Which One Should You Use?
- Acrylic Paint Markers on Canvas: Layering, Blending and Common Mistakes
External reference: Copic layering and blending tutorial.