Every artist remembers their first set of markers — the vivid colors, the smooth flow, the thrill of laying down a saturated stroke. But somewhere between sketch three and sketch thirty, frustration creeps in. Streaks appear. Colors won’t blend. Tips fray. The very tool that promised creative freedom starts to feel like a limitation.
Here’s what most tutorials won’t tell you: mastering marker techniques is only half the equation. The other half is the marker itself — its ink formulation, nib engineering, and manufacturing consistency. When an artist struggles with uneven layering or patchy blending, the root cause often traces back to batch-level quality variance, not skill.
This guide walks you through 10 foundational marker techniques that every aspiring artist should develop, while pulling back the curtain on what separates a professional-grade marker from a disposable one. For brand owners and procurement managers sourcing OEM markers, understanding these distinctions translates directly into fewer customer complaints and stronger market positioning.
Table of Contents
Quick Answer: What Are The Essential Marker Techniques Every Beginner Should Master?
If you’re looking for a rapid-fire overview before diving deep, here are the core marker techniques that form the backbone of marker art:
- Layering from light to dark — Build depth by applying lighter tones first, then gradually introducing darker shades. This prevents muddiness and gives you control over value transitions.
- Wet-on-wet blending — Apply a second color while the first is still wet, or use a colorless blender to create seamless gradients without hard edges.
- Cross-hatching — Overlay parallel lines at intersecting angles to create texture, shadow, and volume — essential for ink-style illustrations and architectural sketches.
- Stippling — Build tone through controlled dots rather than strokes; ideal for creating organic textures like skin, foliage, or fabric.
- Negative space preservation — Plan highlights before you start coloring. Once marker ink saturates the paper, you cannot “erase” back to white — so protecting light areas is a deliberate technique, not an afterthought.
For brand owners and bulk buyers, understanding these fundamental marker techniques provides a practical lens for evaluating product quality. If a marker cannot support smooth layering or consistent blending, your end customers will notice — and they’ll leave reviews that reflect it. The factory you choose directly determines whether your product empowers artists or frustrates them.
Marker Quality Decoded: How Factory Manufacturing Directly Impacts Your Artwork
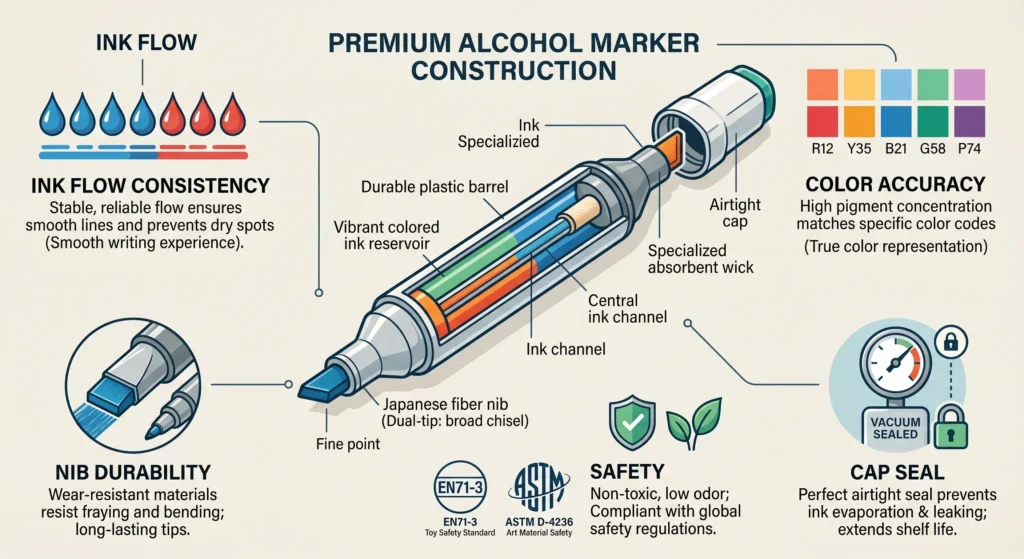
Before diving into technique tutorials, let’s address the elephant in the studio: not all markers are created equal. The following table connects common artist pain points to the factory-side quality controls that prevent them — a framework that professional buyers use to vet suppliers.
| Common Feature / Issue | Why It Matters / Causes Customer Returns | Factory Quality Control Metric |
| Ink flow consistency | Uneven ink delivery creates patchy fills, visible streaks, and ruined gradients — the #1 complaint in marker product reviews. | Spectrocolorimeter batch testing with ΔE ≤ 1.0 tolerance between lab formula and production output. |
| Nib durability and precision | Frayed or deformed tips produce imprecise lines and inconsistent stroke widths after moderate use. | Automated nib insertion with pressure calibration; tip abrasion testing across 500+ linear meters of continuous use. |
| Color accuracy across batches | Artists who repurchase a “Cadmium Red” expect it to match last year’s version. Color drift breaks trust and triggers returns. | In-house ink formulation (not third-party sourced); color-matching records archived per batch with retention samples held for 3 years. |
| Cap seal and drying prevention | A marker that dries out within weeks of purchase is a guaranteed refund request. Cap design is a mechanical engineering problem. | 100% cap-seal vacuum decay testing on every individual unit; airtight polypropylene cap with inner sealing ring. |
| Safety and non-toxicity | Markers used by children, students, and hobbyists must meet regulatory thresholds for heavy metals and volatile organic compounds (VOCs). | EN71-3 (migration of elements), EN71-9 (organic chemical compounds), and ASTM D-4236 certification — tested annually by accredited third-party labs. |
These QC metrics aren’t abstract. They are the reason one marker produces a flawless gradient while another leaves a streaky mess — even in the same artist’s hands. When sourcing markers for your brand, treat this table as your minimum due diligence checklist.
10 Marker Techniques Every Artist Should Develop
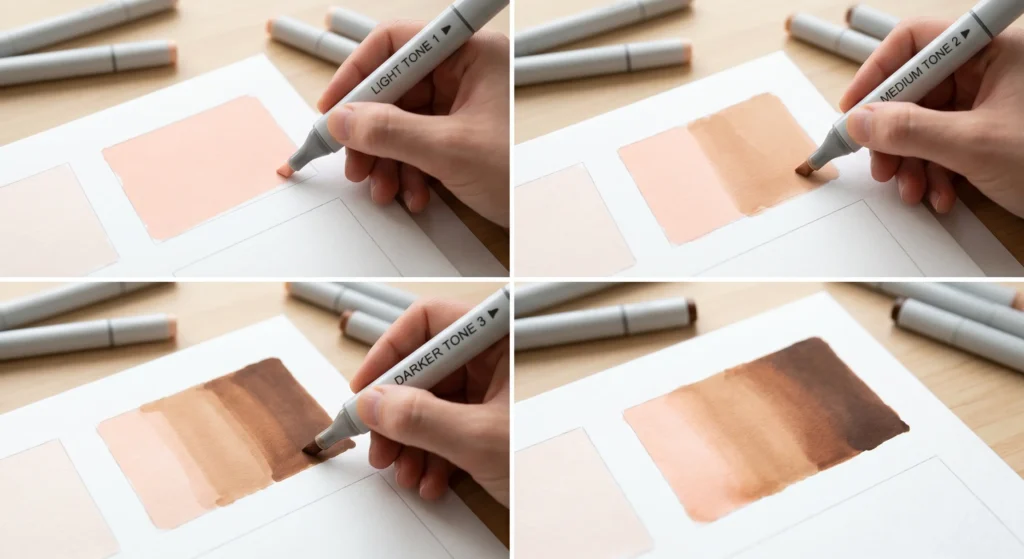
1. Light-To-Dark Layering: The Foundation Of Marker Art
Marker ink is translucent by nature. Unlike opaque paints that can cover mistakes, markers build color through transparency — which means your layering sequence determines everything.
How to execute: Start with your lightest tone and apply even, overlapping strokes. Work in small circular motions or consistent horizontal passes. Let the first layer dry completely (alcohol markers dry in seconds; water-based markers may need 30–60 seconds), then apply the next darker shade to areas requiring depth. Repeat with progressively darker tones, keeping each layer’s edge soft to avoid harsh transition lines.
Why it fails: If the marker’s ink formulation has inconsistent viscosity between batches, the same “light gray” you used last month may apply differently this month. At factories like ZH STATIONERY, where ink is formulated in a dedicated in-house laboratory rather than sourced from external suppliers, every batch undergoes viscosity testing before filling — ensuring that brand owners receive the same layering behavior across every production run. After 26 years of OEM manufacturing, the company maintains archived ink recipes for every custom color ever produced, making reorders identical to originals.
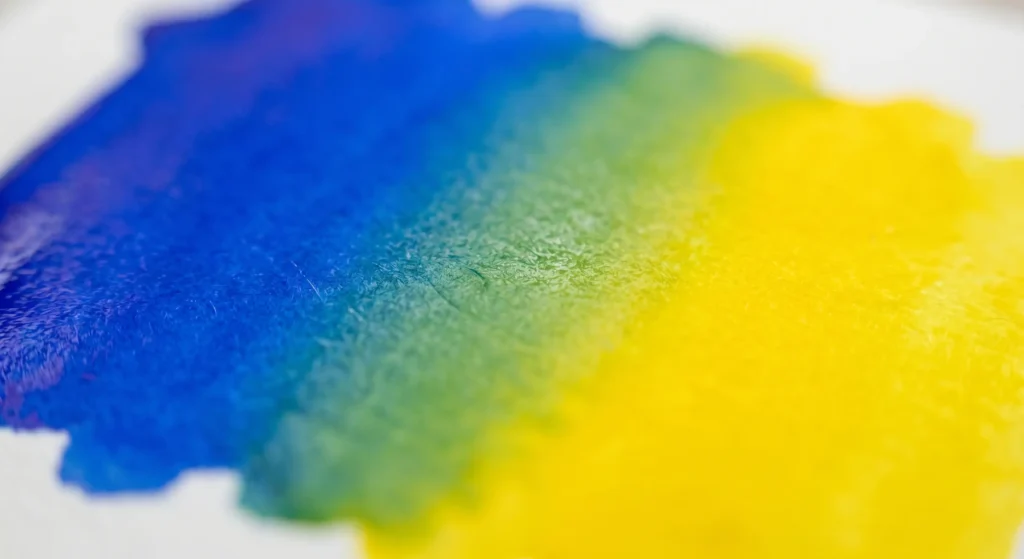
2. Wet-On-Wet Blending: Creating Seamless Transitions
Blending is where markers truly shine — or fail spectacularly. The wet-on-wet technique involves applying a second color while the first is still wet, allowing the solvents to intermix at the boundary and create a smooth gradient.
How to execute: Lay down your base color. Immediately — before the ink dries — apply the blending color, slightly overlapping the wet edge. Use a colorless blender pen to feather the transition zone if needed. Alcohol-based markers excel at this marker technique because their solvent evaporates slower and reactivates underlying ink.
The factory perspective on blending: Blending performance is fundamentally about ink chemistry. A marker’s solvent blend, dye concentration, and surface tension collectively determine how two colors interact at their boundary. When ZH STATIONERY develops custom ink formulations for brand clients, the lab tests blending compatibility not just within one SKU, but across the entire color palette — because an artist blending “Sky Blue” into “Cerulean” expects the result to match the swatch card, every time.
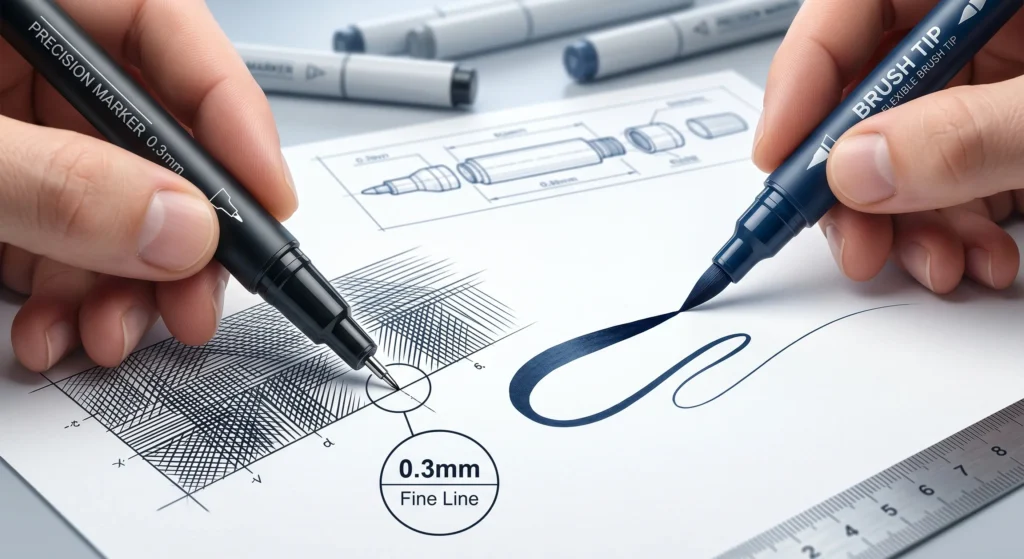
3. Cross-Hatching: Building Texture Through Line
Cross-hatching isn’t just for ink pens. With fine-tip markers (0.3mm–0.5mm), artists can create dimensional shading, fabric textures, and architectural details that flat fills cannot achieve.
How to execute: Apply parallel lines in one direction for the first layer of tone. For deeper shadows, overlay a second set of parallel lines at a 30°–60° angle. For the darkest values, add a third layer at yet another angle. The density and angle of lines control perceived darkness — not pressure (pressing harder damages the nib).
Nib precision matters here. A nib that frays after 200 meters of use cannot deliver the crisp, consistent lines that cross-hatching demands. ZH STATIONERY’s 4,000-square-meter automated production facility uses calibrated nib insertion machinery that maintains ±0.02mm positional tolerance — because a nib seated 0.1mm off-center creates asymmetric line width that ruins hatching precision.
4. Stippling: Dot-By-Dot Texture Control
Stippling — applying thousands of tiny dots to build tone — is one of the most time-intensive marker techniques, but produces uniquely organic results unmatched by any other method.
How to execute: Hold the marker vertically. Apply dots with consistent spacing in lighter areas, and progressively increase dot density for darker tones. The technique works best with fine-point or brush-tip markers. Vary dot size subtly by adjusting dwell time (how long the tip contacts the paper).
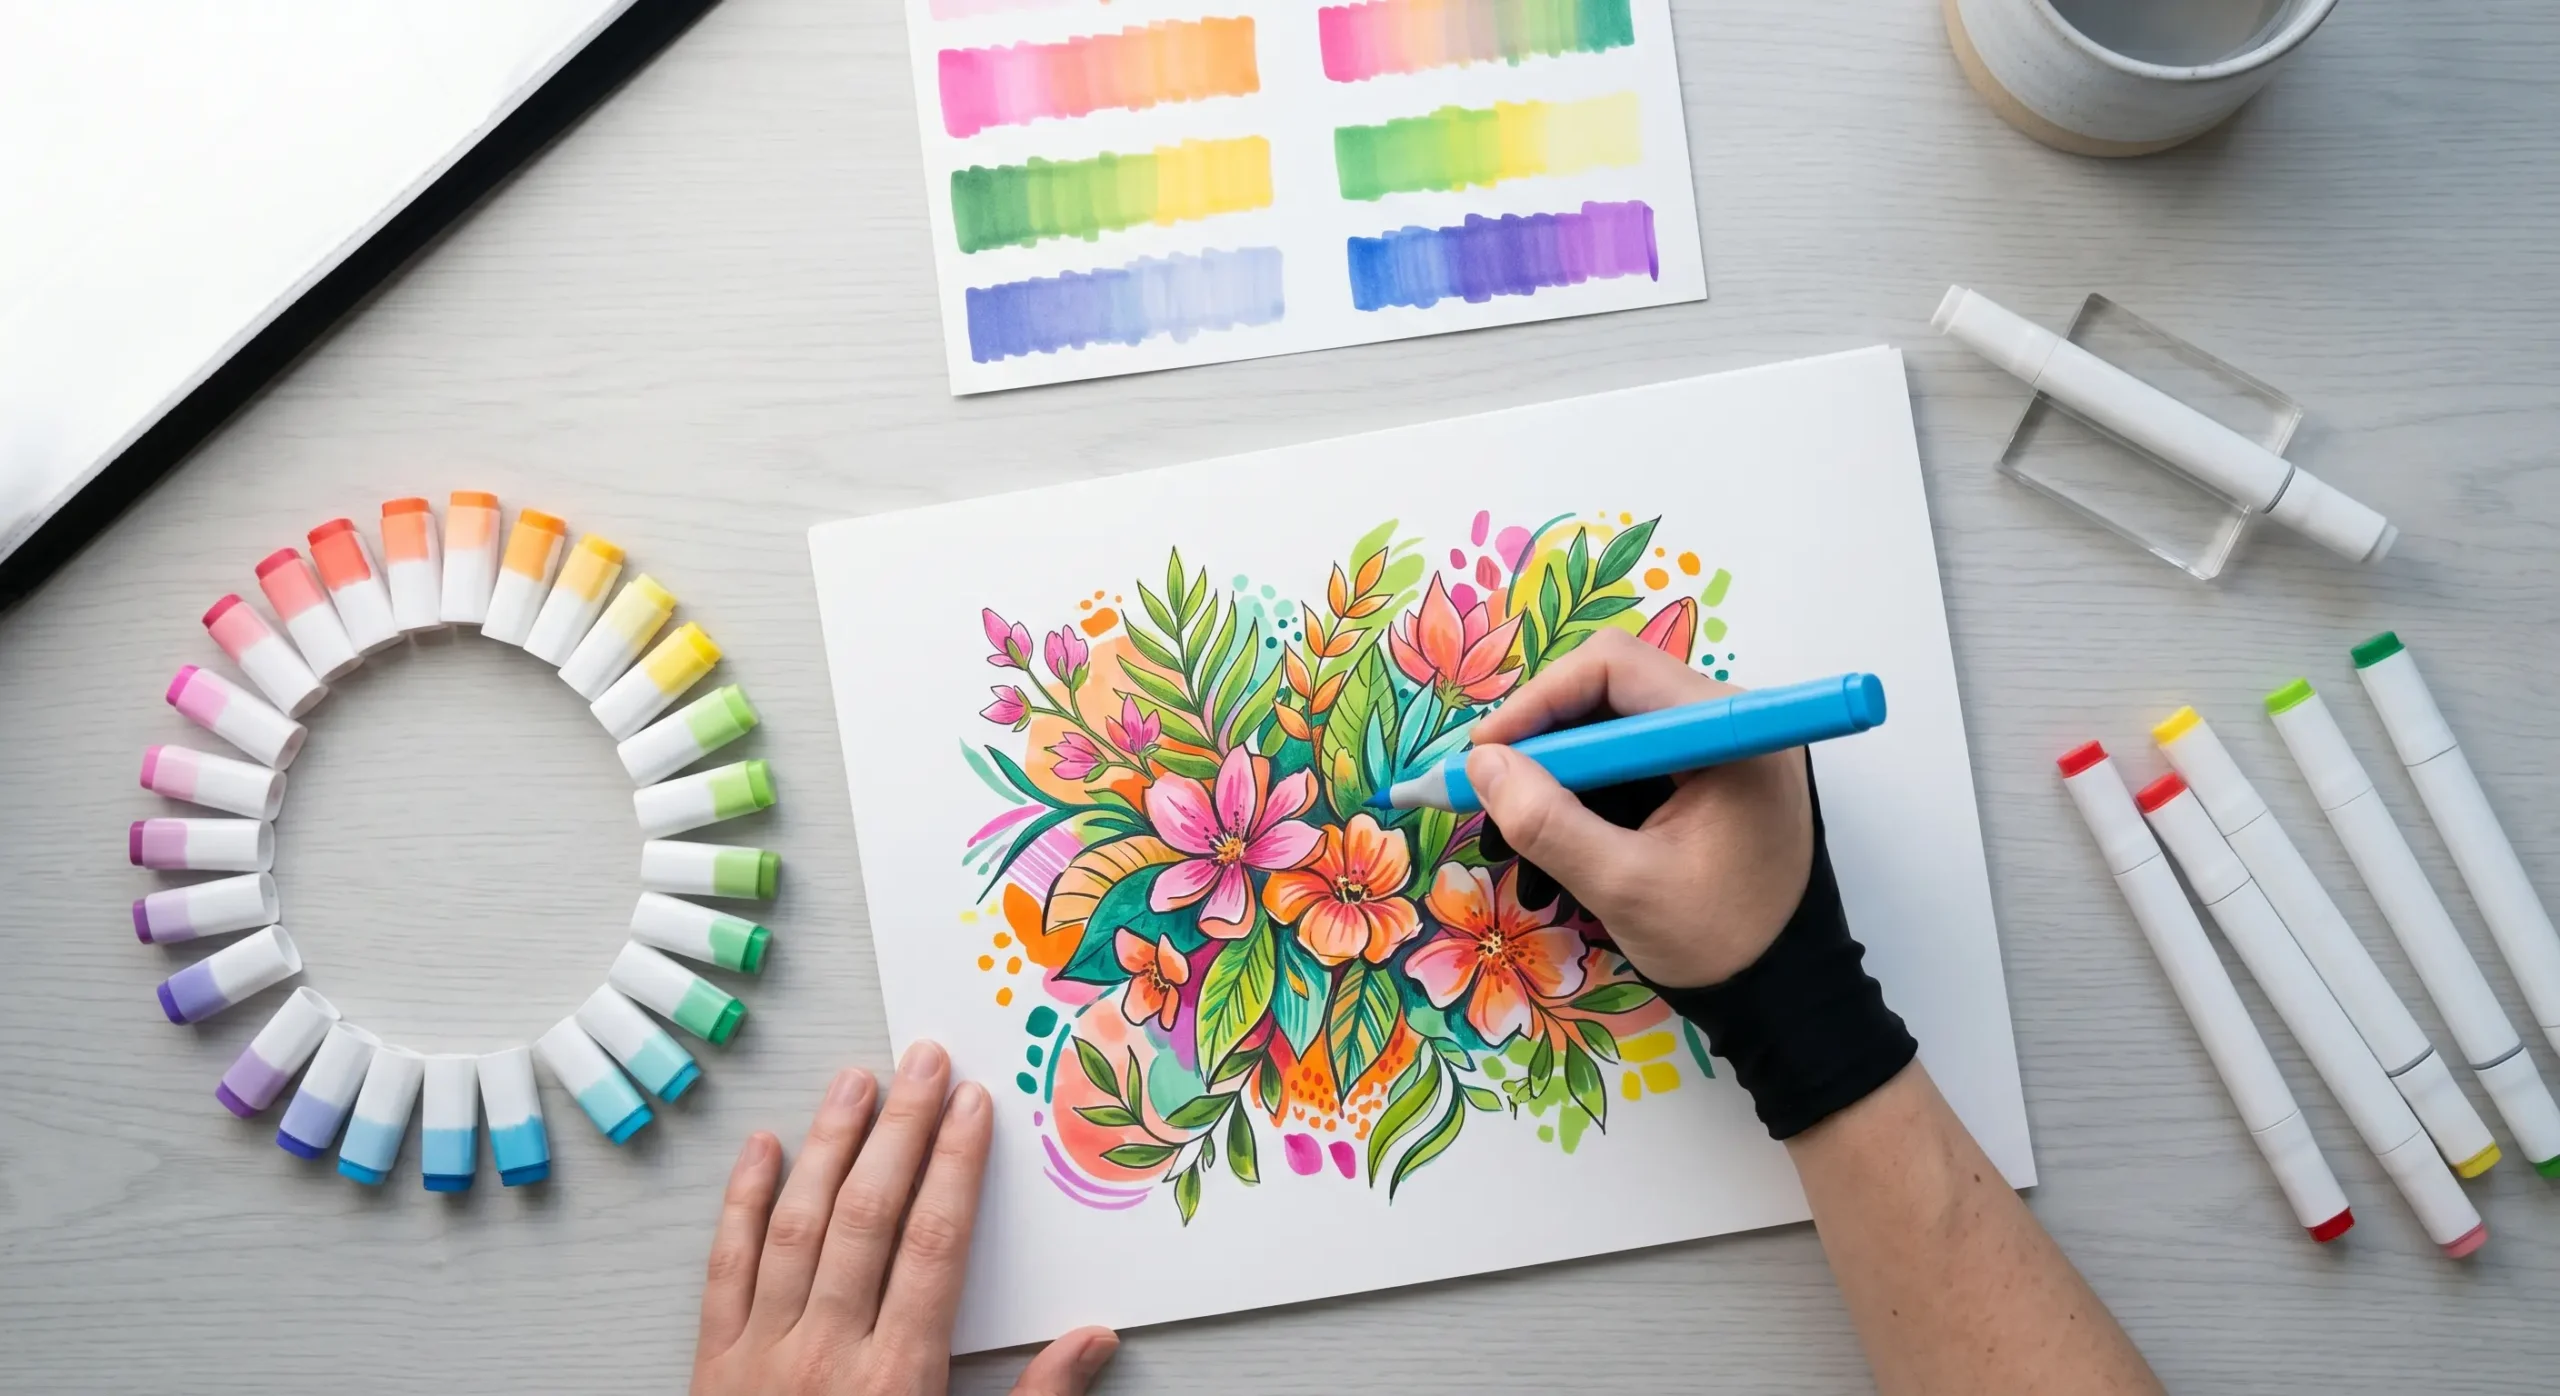
5. Gradient / Ombre Effects
Gradient fills — smooth transitions from one color to another, or from saturated to faded — are a hallmark of professional marker work commonly seen in fashion illustration, product design sketching, and manga coloring.
How to execute: The most reliable method is the “three-marker approach”: use your lightest tone as the base, your mid-tone for the transition zone, and your darkest tone for the deep end. Blend the boundaries with a colorless blender while all three are still wet.
ZH STATIONERY’s 100% full-inspection QC protocol means that every single marker produced — not just a statistical sample — is checked for ink volume and flow consistency before packaging. For a 2,000-unit brand order, this eliminates the all-too-common scenario where Marker #47 in a set underperforms because it was under-filled by 12%. Full inspection is expensive for the factory, but far cheaper than processing returns from disappointed end users.
6. Colorless Blender Mastery
The colorless blender is arguably the most misunderstood tool in an artist’s marker set. It contains only solvent — no pigment — yet it’s capable of pushing pigment, softening edges, creating highlights, and even “erasing” small mistakes on non-porous surfaces.
How to execute:
- Push technique: Apply blender to the paper before color, then immediately add pigment — the color spreads into the wet zone.
- Pull technique: Apply blender to dried pigment to lift and move color toward lighter areas.
- Edge softening: Trace the boundary between two colors with blender to eliminate hard lines.
Because the colorless blender is pure solvent, its formulation must be chemically compatible with every ink color in the set. This is non-trivial. ZH STATIONERY develops blender solvent formula alongside each custom ink palette, testing compatibility across the full color range before approving production — a step that externally sourced, off-the-shelf ink suppliers rarely perform.

7. Mixed Media: Markers + Colored Pencils / Pastels
Professional illustrators rarely use markers in isolation. Combining alcohol markers as a base layer with colored pencil detail work, gel pen highlights, or pastel textures produces depth that no single medium can achieve.
How to execute: Apply marker layers first (alcohol markers bond with paper fibers and create a sealed surface). Once fully dry, add colored pencil details — the slightly slick surface actually enhances pencil precision. Use white gel pens or acrylic paint pens for final highlights.
ZH STATIONERY’s metallic marker line is particularly well-suited to mixed-media workflows. The company’s in-house ink lab formulates metallic pigments with controlled particle size distribution — fine enough to flow through a marker nib without clogging, yet large enough to catch light and produce genuine metallic reflectance, not just gray shimmer.
8. Highlighting And Negative Space Planning
As noted in the Quick Answer, marker ink is permanent once applied. Unlike digital art with an undo button, or graphite that can be erased, marker highlights require proactive planning.
How to execute: Before applying any color, lightly sketch highlight zones with a hard pencil (2H–4H). As you layer color, work around these zones — or use the colorless blender push technique to preserve them. For metallic highlights on finished pieces, ZH STATIONERY’s metallic markers deliver opaque coverage over dried alcohol ink, making post-hoc highlighting possible.
9. Line Weight Variation
Line weight — the thickness or thinness of a stroke — communicates volume, lighting direction, and depth of field. Mastering line variation turns flat line art into dimensional illustration.
How to execute:
- Thick lines = areas in shadow, foreground objects, and structural outlines.
- Thin lines = areas facing light, background elements, and interior details.
- Brush-tip markers excel here because tip pressure directly controls line width. A well-engineered brush tip should deliver a 5:1 thick-to-thin ratio without requiring excessive pressure.
The brush tip’s fiber binding and elasticity directly determine how well it performs this marker technique. ZH STATIONERY sources Japanese and German nib materials and tests every batch for resilience — measuring tip recovery time after compression and ensuring consistent elasticity across production lots.
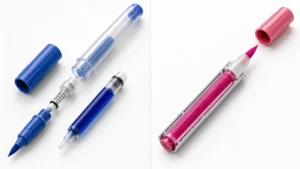
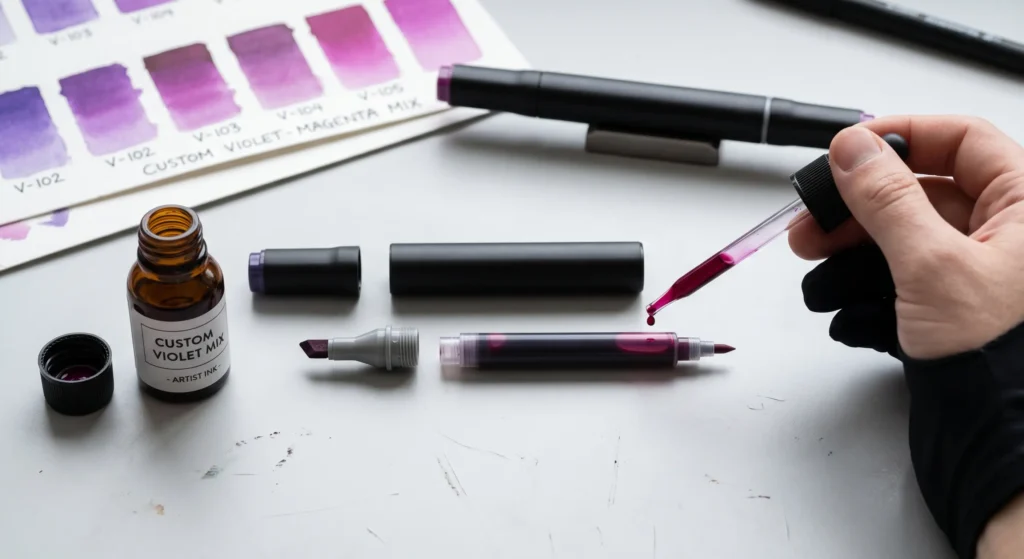
10. Custom Color Mixing And Refill Techniques
Advanced artists often blend custom colors by mixing inks or refilling markers with modified formulations. This technique extends a marker’s lifespan and enables signature color palettes.
How to execute: Using refillable marker bodies (increasingly popular in professional lines), artists can mix custom hues from base ink colors. The key is working with refill inks that use identical solvent chemistry — mixing different solvent systems produces unpredictable results.
For B2B buyers, this trend toward refillable systems has important implications. ZH STATIONERY offers refill-compatible marker designs with removable end plugs and standardized ink cartridges. The company’s EN71 and ASTM D-4236 certifications apply to both the markers and the refill inks sold alongside them — because safety compliance cannot stop at the pen body.
Certifications & Custom Manufacturing Capabilities
When sourcing markers for a brand — whether you’re launching a new art supply line, creating promotional merchandise, or expanding an existing product catalog — compliance documentation is your first line of defense. The European and North American markets require specific certifications, and customs authorities enforce them rigorously.
Key certifications for marker products:
- EN71-3 & EN71-9 (EU): Migration limits for 19 heavy metals; limits on organic chemical compounds. Mandatory for any art material marketed to children under 14 in the EU.
- ASTM D-4236 (US): Standard practice for labeling art materials for chronic health hazards. Required by US federal law (LHAMA) for art materials sold in the United States.
- REACH (EU): Registration, Evaluation, Authorisation, and Restriction of Chemicals. Applies to ink formulations containing substances of very high concern (SVHCs).
- CE Marking (EU): Declaration of conformity with applicable EU health, safety, and environmental directives.
Why partner with ZH STATIONERY for your marker line?
- Low MOQ — 2,000 units per SKU. Launch, test, and iterate without committing to container-load volumes. Ideal for new brands and limited-edition collections.
- Full customization from concept to container. In-house 3D design and rapid physical prototyping means you see and hold a sample of your marker before tooling begins. Custom barrel shapes, grip textures, clip designs, and packaging are all supported.
- 26 years of OEM/ODM expertise. Since 2000, ZH STATIONERY has manufactured for brands across 30+ countries. The factory understands international retail packaging requirements, barcode placement standards, and destination-market labeling regulations — saving first-time brand owners months of learning.
- 4,000 m² automated production facility with dedicated assembly lines for alcohol markers, water-based markers, and metallic markers — enabling parallel production for multi-SKU orders.
- 2,000+ new SKUs developed annually. The R&D pipeline includes ongoing work in low-odor formulations, refillable systems, and sustainable packaging materials.
- Free samples for qualified buyers. Test marker techniques firsthand on your own paper, with your own team, before committing to a production run.
Request your free sample kit and custom quote today →
Frequently Asked Questions
What is the best marker technique for absolute beginners?
The light-to-dark layering technique is the most accessible starting point. It requires no special tools beyond the markers themselves, builds fundamental color theory intuition, and produces satisfying results quickly. Begin with three tones of a single hue (light, medium, dark) and practice building gradients on smooth marker paper before attempting multi-color compositions.
Are alcohol-based markers better than water-based markers?
“Better” depends entirely on the application. Alcohol markers blend more smoothly, dry faster, and work on a wider range of surfaces — making them the standard for illustration, manga, and product design. Water-based markers are odorless, washable, and safer for young children — ideal for classroom and educational settings.
ZH STATIONERY manufactures both types, and the in-house ink lab develops formulations optimized for each application. For brands unsure which direction to take, the company’s OEM consultation service includes market positioning guidance based on your target demographic and distribution channel.
How do I prevent streaks when using markers?
Streaking occurs when ink dries before adjacent strokes can merge. The solution is a combination of technique and tool quality: work faster, use markers with higher ink flow rates, and choose paper specifically designed for alcohol markers (coated, low-absorbency stock). If streaking persists across different techniques and papers, the marker’s ink delivery system or formulation may be the root cause — not your skill level.
How can I find a reliable marker pen manufacturer for my brand?
Start with certification verification — any legitimate factory serving EU/US markets maintains current EN71 and ASTM D-4236 test reports (not just certificates, but actual third-party lab reports with batch numbers). Visit the factory or request a video walkthrough; a 4,000-square-meter automated facility looks very different from a trading company office. Request production samples from current stock (not “golden samples” prepared specifically for you), and ask about their reorder color-matching process — this reveals whether they archive ink formulas or simply re-source each time.
What safety certifications are required to sell markers in Europe and the US?
For the EU market: EN71-3 (heavy metal migration), EN71-9 (organic compounds for products likely to be mouthed), and REACH compliance. For the US market: ASTM D-4236 labeling under LHAMA, with toxicological review by a board-certified toxicologist. Some retailers also require ACMI AP (Approved Product) certification. ZH STATIONERY maintains all of the above and provides complete compliance documentation with every shipment.
Does ZH STATIONERY support custom colors and packaging with a low minimum order?
Yes. Custom ink colors (matched to your brand’s Pantone or existing palette) and fully custom packaging — from individual marker sleeves to retail-ready box sets — are available starting at 2,000 units per SKU. The in-house 3D design team produces physical prototypes within 7–10 business days of design approval. If you’re exploring a marker line and want to evaluate quality before committing, request your free sample kit here → .
Conclusion: Technique Meets Manufacturing — Why Both Matter For Great Art
The 10 marker techniques covered in this guide — layering, blending, cross-hatching, stippling, gradients, blender mastery, mixed media, negative space, line variation, and custom mixing — represent the skill set that separates casual doodlers from serious artists. But technique only takes you as far as your tools allow.
A marker that bleeds unpredictably, fades after three weeks, or delivers different color density from batch to batch undermines every hour an artist invests in practice. This is why professional illustrators and brands alike gravitate toward manufacturers who treat marker production as precision engineering, not commodity assembly.
With 26 years of OEM/ODM manufacturing, an in-house ink R&D laboratory, 100% unit-level quality inspection, and full compliance with EN71 and ASTM D-4236 standards, ZH STATIONERY bridges the gap between artistic ambition and industrial reliability. Whether you’re an artist seeking tools that perform consistently, or a brand owner building a product line your customers will trust, the foundation starts at the factory floor.
Explore our OEM marker solutions and request a free sample →